$29.00
The File Manager Digital Ocean add-on provides you the ability to edit, delete, upload, download, copy and paste files and folders in Digital Ocean directly from your WordPress website.
Description
The Digital Ocean add on for File Manager is a handy feature that will save you time from having to jump back and forth when transferring files. Outlined below are the instructions of installing and configuring the addon with your WordPress website.
How Digital Ocean works: Once the addon has been purchased, download and installs it the same way you would install any other plugin on WordPress. After the installation is complete, be sure to activate the plugin. If you have completed the steps correctly, you will see the Digital Ocean option under the File Manager menu. If you click the Digital Ocean option you will notice that 3 tabs need to be configured. See the images below:
General
- Enable Digital Ocean: This setting will allow you to enable Digital Ocean in File Manager.
- Digital Ocean App Key: This is required to create the connection with Digital Ocean, you can find this within your API section of the Digital Ocean Control Panel.
- Digital Ocean Secret: This is required to create the connection with Digital Ocean, you can find this within your API section of the Digital Ocean Control Panel.
- Digital Ocean Region: This is required to create the connection with Digital Ocean, you can find this within your Digital Ocean Control Panel.
- Digital Ocean Bucket: This is the Digital Ocean bucket you would want to configure in File Manager.
- Select User Roles to access WP File manager Digital Ocean: Choose the permissions of the users you assign to access the Digital Ocean menu.
- Separate or Private Folder Access: You can set specific folders of the Digital Ocean bucket to be accessed by default to all users.
User Restrictions
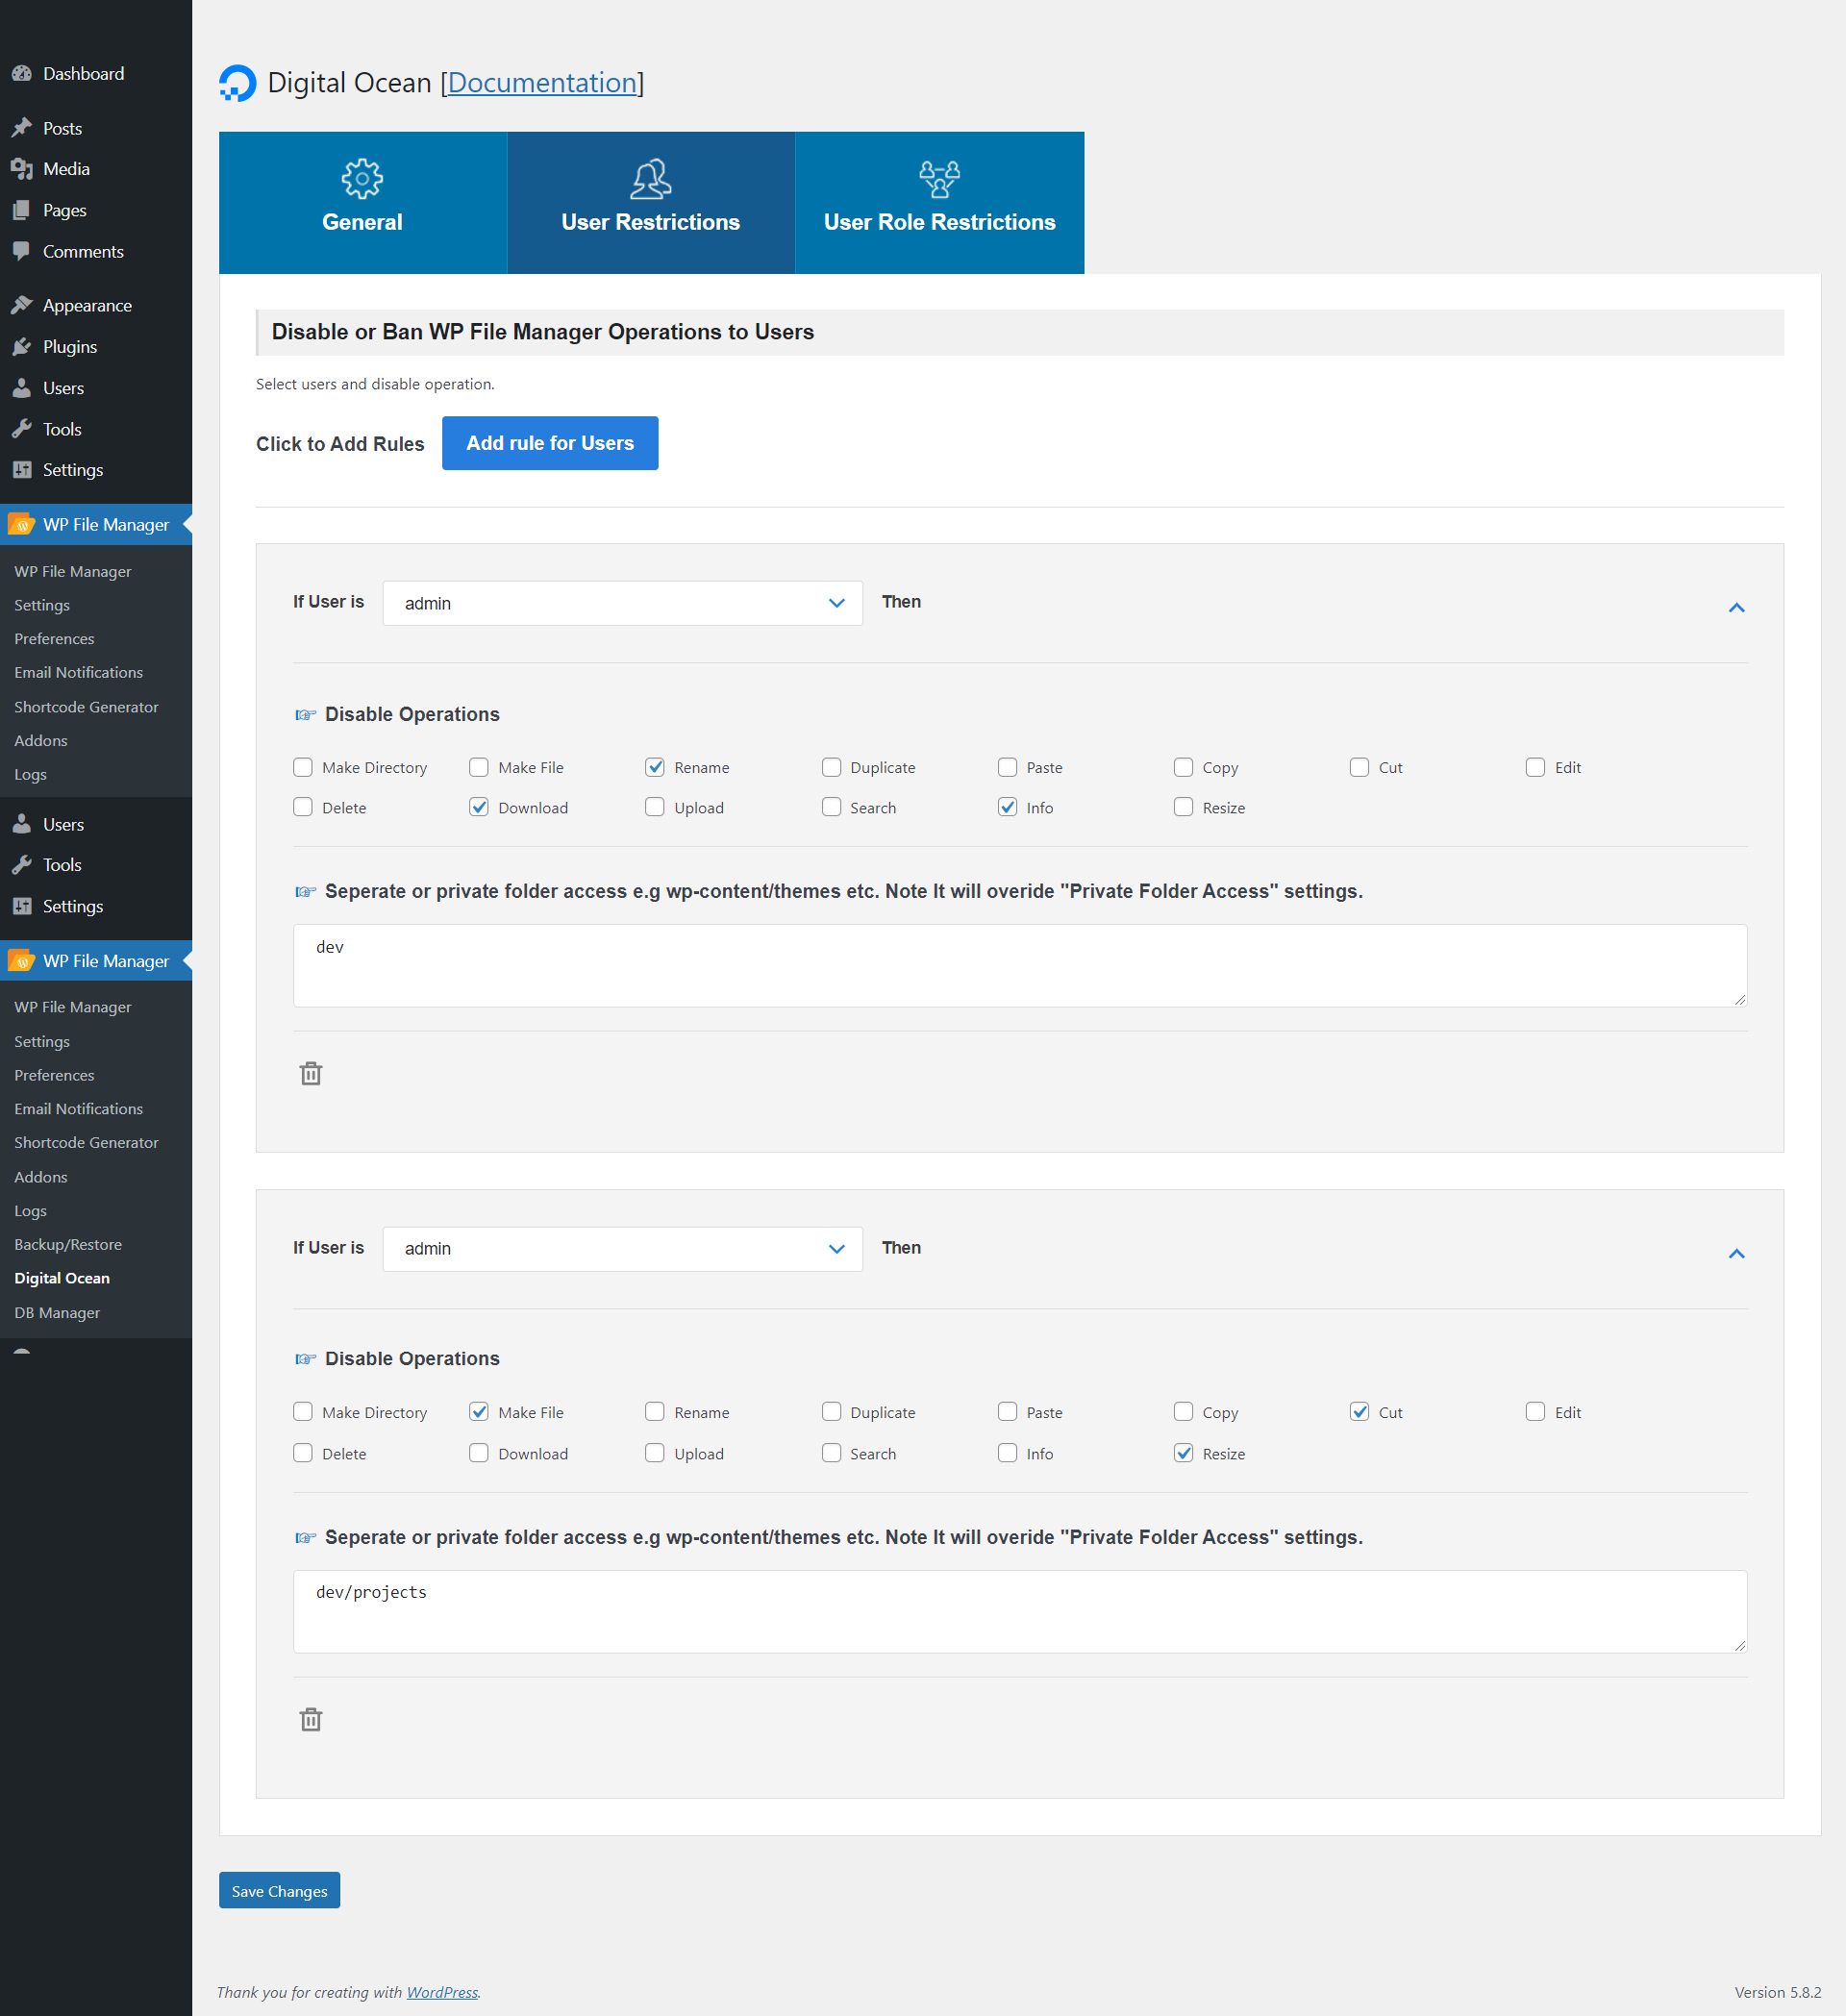
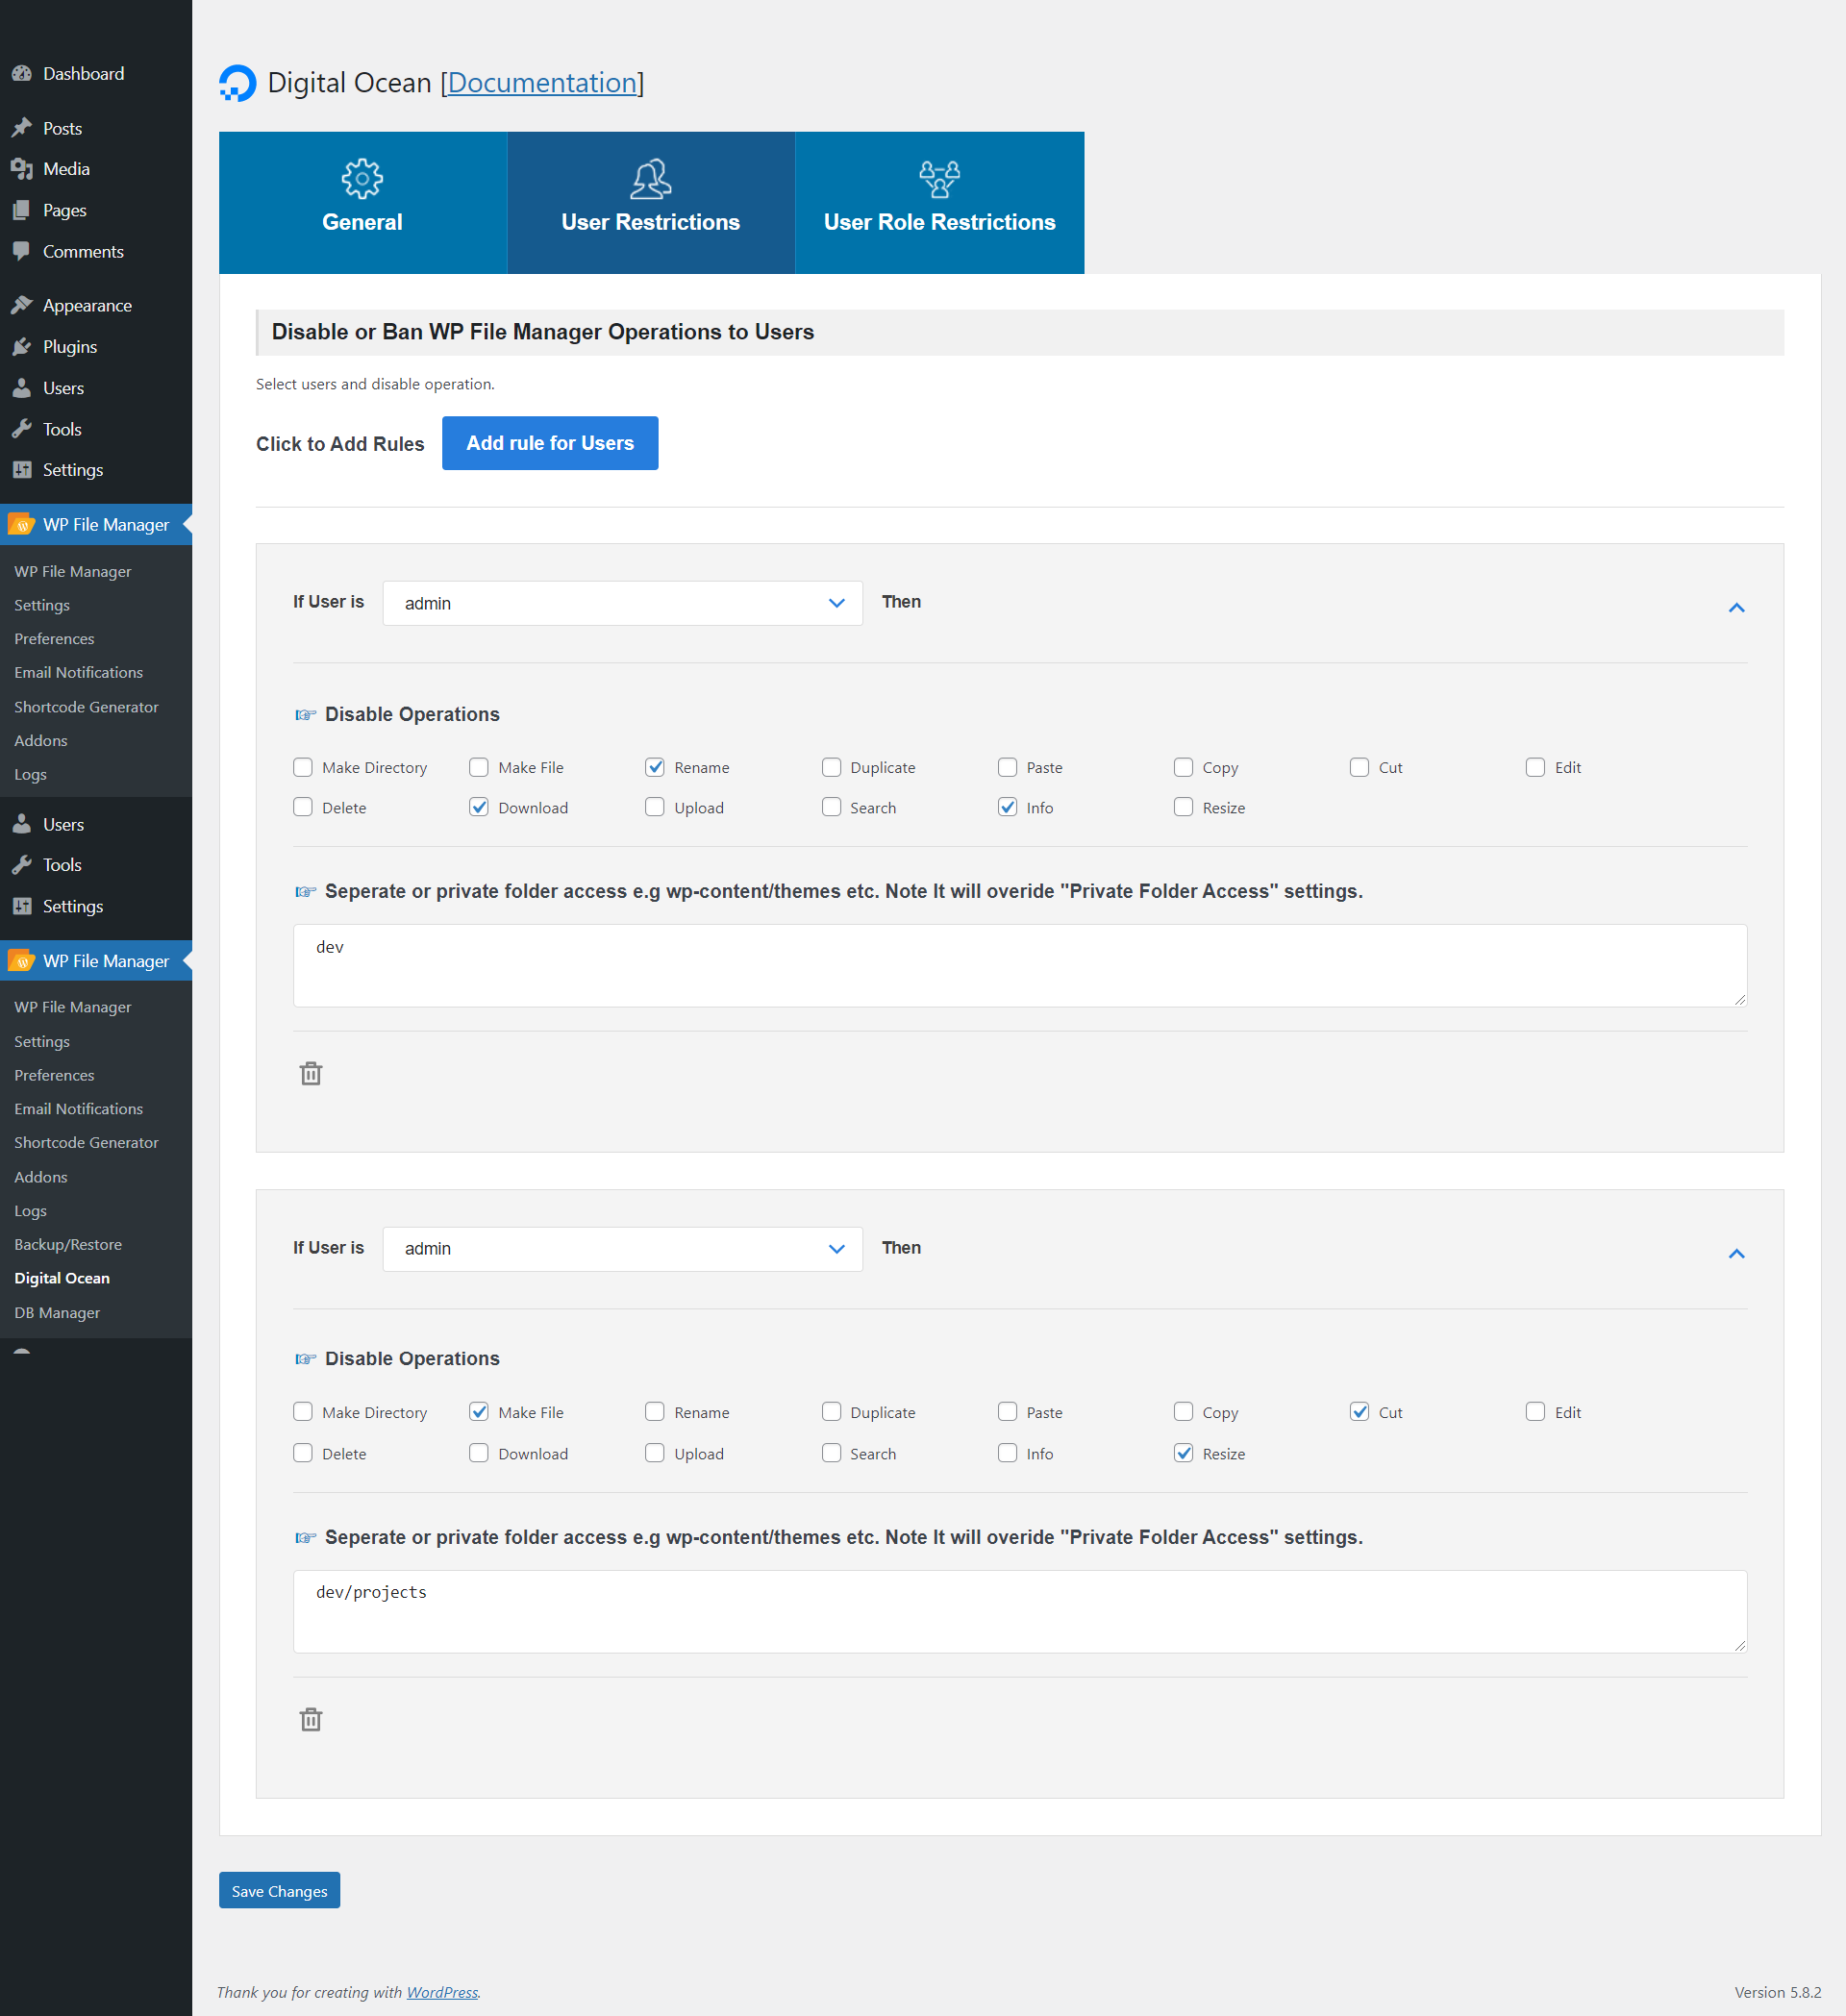
User Restrictions: User Restrictions: This section will allow you to disable users from performing Digital Ocean File Manager operations. To set up a rule, click on the “Add a rule for Users” button. There are 3 settings available:
- If User is: Select a user from the dropdown list which you want to ban from accessing the WP File Manager Digital Ocean operations.
- Disable Operations: Choose the operations which you want to disable for that specific user.
- Seperate or private folder access: Set specific folders of the Digital Ocean bucket to be accessed by the user.
User Role Restrictions
User Role Restrictions: This setting allows you to disable or ban all the users in a specific role from performing WP File Manager Digital Ocean operations. Click on the “Add rule for User Roles” button to add a rule for the role. There are 3 settings:
- If User role is: Select a user role from the dropdown list which you want to ban from accessing the WP File Manager Digital Ocean operations.
- Disable Operations: Choose the operations which you want to disable for that specific user role.
- Seperate or private folder access: You can set specific folders of the Digital Ocean bucket to be accessed by this user role.
Shortcodes: There are 2 shortcodes available to display WP FileManager Digital Ocean on the frontend.
[wp_file_manager_digital_ocean key= "your_digital_ocean_key" secret= "your_secret_key" region="your_digital_ocean_region" bucket="your_digital_ocean_bucket" view="list" lang="en" theme="default" allowed_roles="administrator,editor,author" allowed_operations="*" access_folder="separate_folder-name"]
In this shortcode key, secret, region, bucket,access_folder are optional to use in the shortcode. The main objective of adding these options is to lower the dependency of General Settings of the Digital Ocean. You can use any other Digital Ocean bucket details here. In this way, you can connect multiple Digital Ocean buckets using this shortcode
[wp_file_manager_digital_ocean_admin]
Using this shortcode you can create an admin view on your wordpress page/post.


