
 Supercharge File Manager Pro with the New Cloudflare R2 Addon

$29.00
The File Manager Google Cloud add-on provides you the ability to edit, delete, upload, download, copy and paste files and folders in Google Cloud directly from your WordPress website.
Description
Introduction: Google Cloud is one of the most sophisticated, reliable, and cloud infrastructure. It offers services for computing, storage, networking, big data etc. File Manager Google Cloud Addon adds a feature to access Google Cloud Bucket in FileManager Pro. Using this addon you can sync your Google Cloud bucket within your WordPress admin panel or you can display cloud files with shortcodes. It provides you with features to perform different file/folder operations like upload, download, create, delete, cut, copy, paste and much more. Google Cloud addon of File Manager Pro makes it easy to manage from one area, no need to access Google Cloud separately anymore.
How to Install File Manager Google Cloud: To install the File Manager Google Cloud plugin, you need to follow the following steps:
- Download the zip file of the plugin from your order email
- Login to your WordPress admin panel.
- Navigate to the ‘Add New’ in the Plugins Dashboard
- Navigate to the ‘Upload’ area
- Navigate to the location where you have placed the downloaded zip file. Select the zip file from your computer
- Click ‘Install Now’
- Activate the Plugin in the Plugin dashboard
- You will see the Google Cloud menu will start appearing under the File Manager menu in the left sidebar of the WordPress admin panel.
- When you click on the Google Cloud menu you will see a page where you have to put the license key which you will get from your order email.
- Paste the licence key and click on the ‘Click To Verify’ button.
- Once your license key is verified you will have to install the required libraries for the File Manager Google Cloud addon to work with File Manager Pro.
How File Manager Google Cloud works: Once the plugin is successfully installed and activated, the Google Cloud menu will appear inside the File Manager Pro menu in the left sidebar in the admin panel of WordPress. There are 3 settings in Google Cloud:
1. General
2. User Restrictions

3. User Role Restrictions
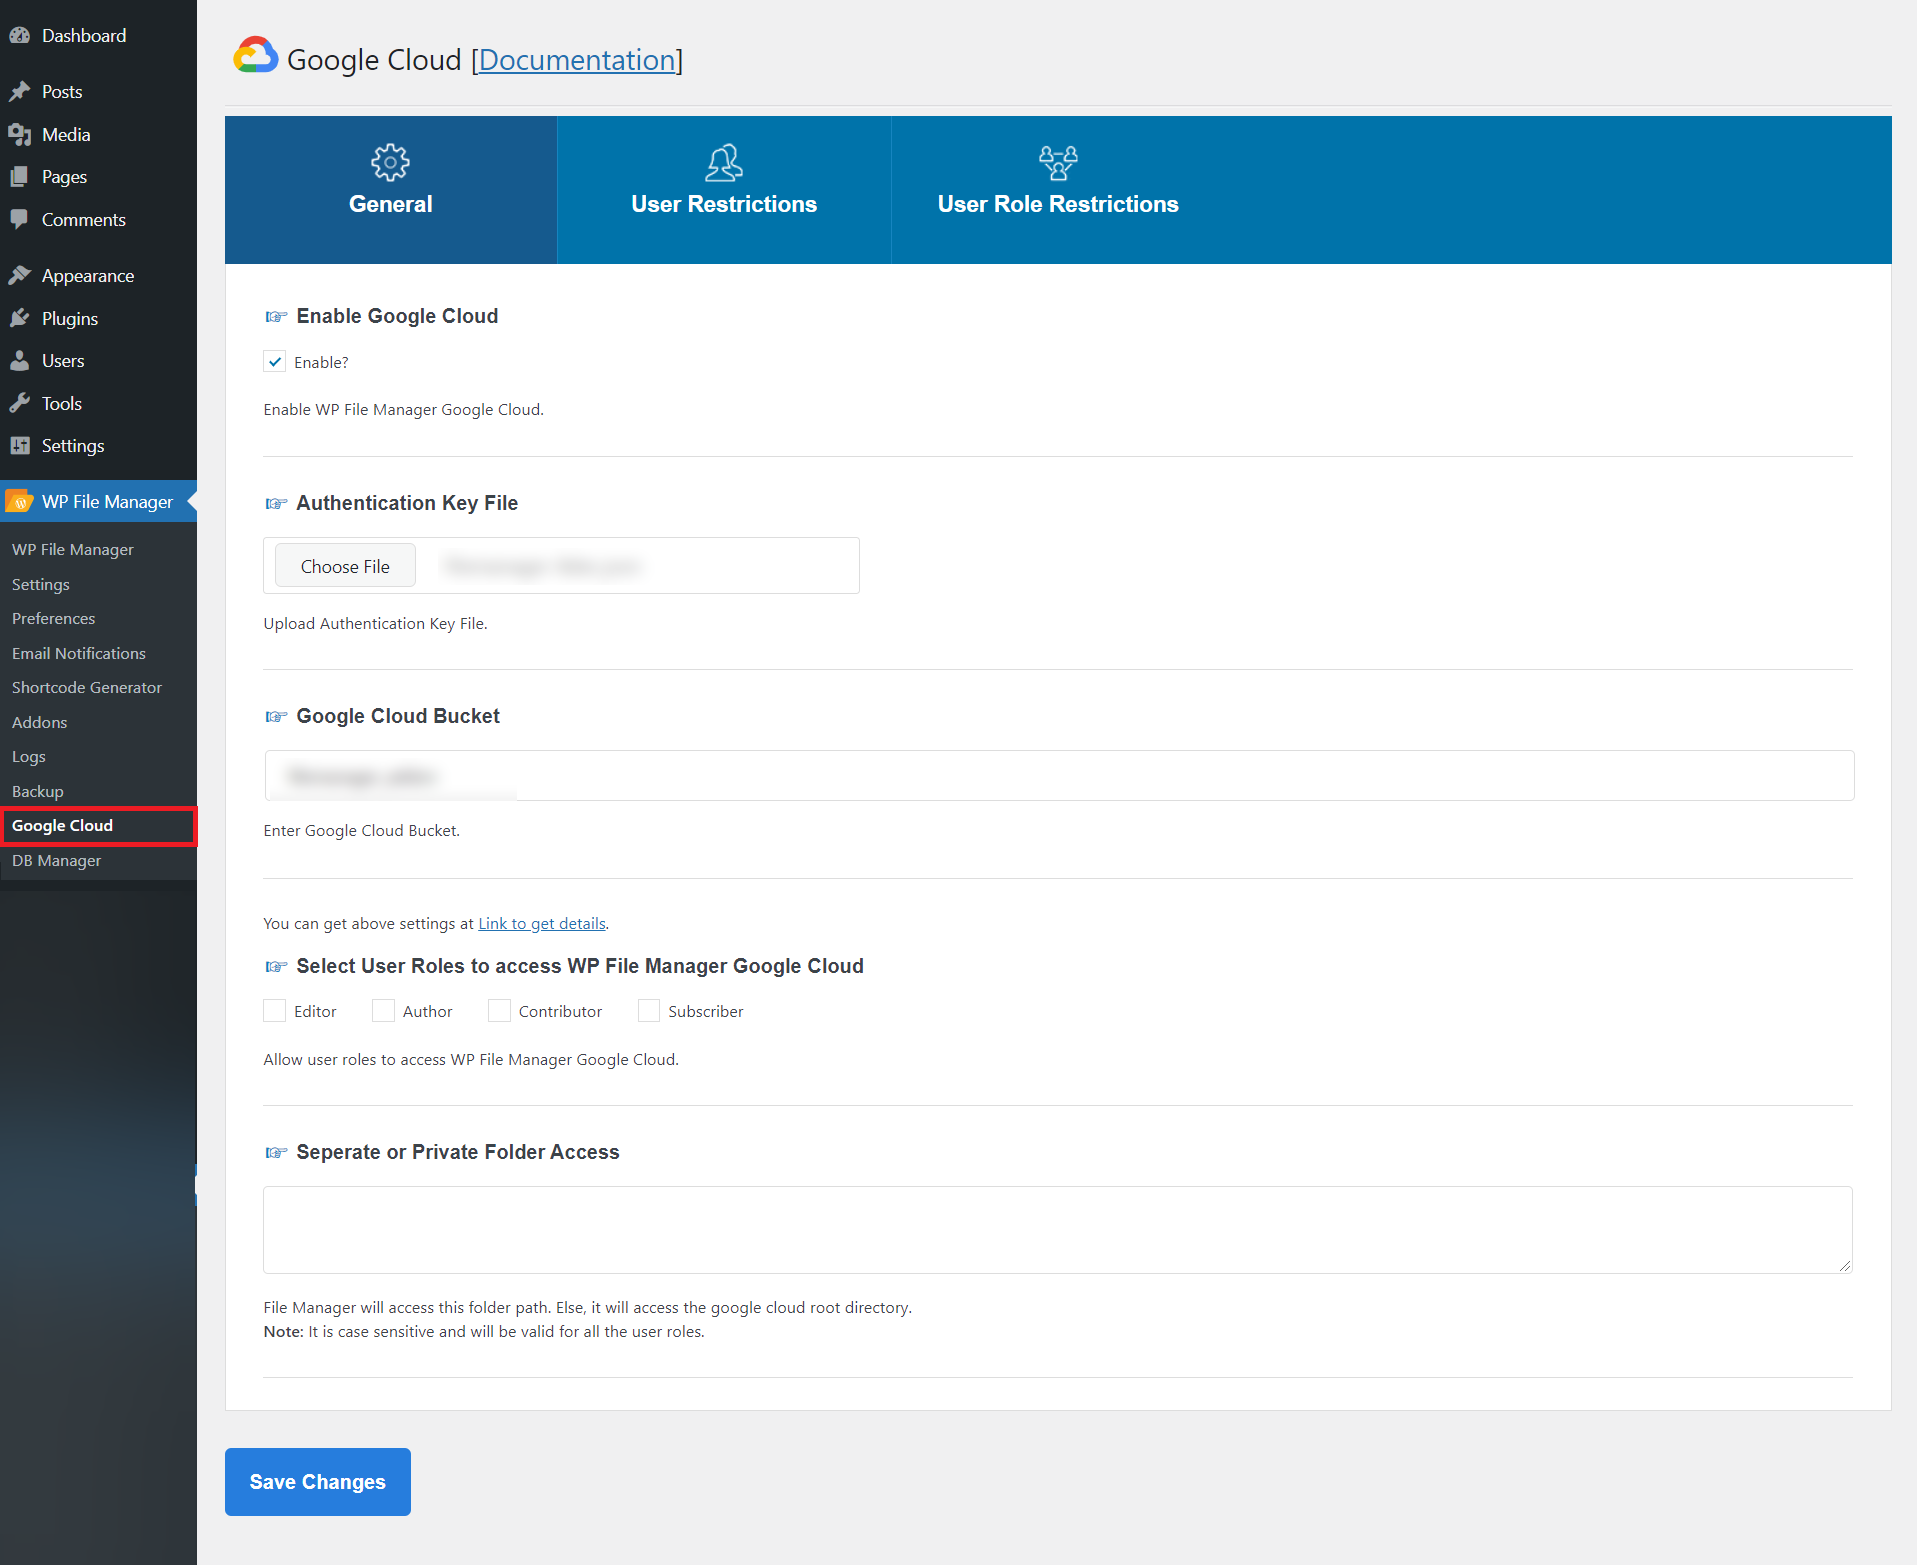
General: In the General settings tab, there are default settings required for Google Cloud to function properly.
- Enable Google Cloud: Using this setting, you can allow permission to enable Google Cloud in File Manager. Without this permission, Google Cloud will not work with File Manager Pro.
- Authentication Key File: This is a JSON file that will be obtained from the app you created in the Google Cloud Account.
- Google Cloud Bucket: Google Cloud Bucket is the name of your bucket which you want to configure in File Manager.
- Select User Roles to access WP File Manager Google Cloud: Using this setting, you can choose the user roles to whom you allow permission to access the Google Cloud menu.
- Separate or Private Folder Access: Using this setting, you can set a specific folder of your bucket. For example your bucket is Master and this bucket has multiple folders. You can set a separate folder by putting the name of the folder like a developer. You can also set access to the folder inside a folder such as developer/projects
User Restrictions: This setting allows you to disable or ban users from performing WP File Manager Google Cloud operations. Click on the Add Rule for Users button to add a rule for the user. There are 3 settings:
- If User Role is: Select a user from the dropdown list which you want to ban from accessing the WP File Manager Google Cloud operations.
- Disable Operations: Choose the operations which you want to disable for that specific user.
- Separate or private folder access: You can set a specific folder of the bucket to be accessed by this user.
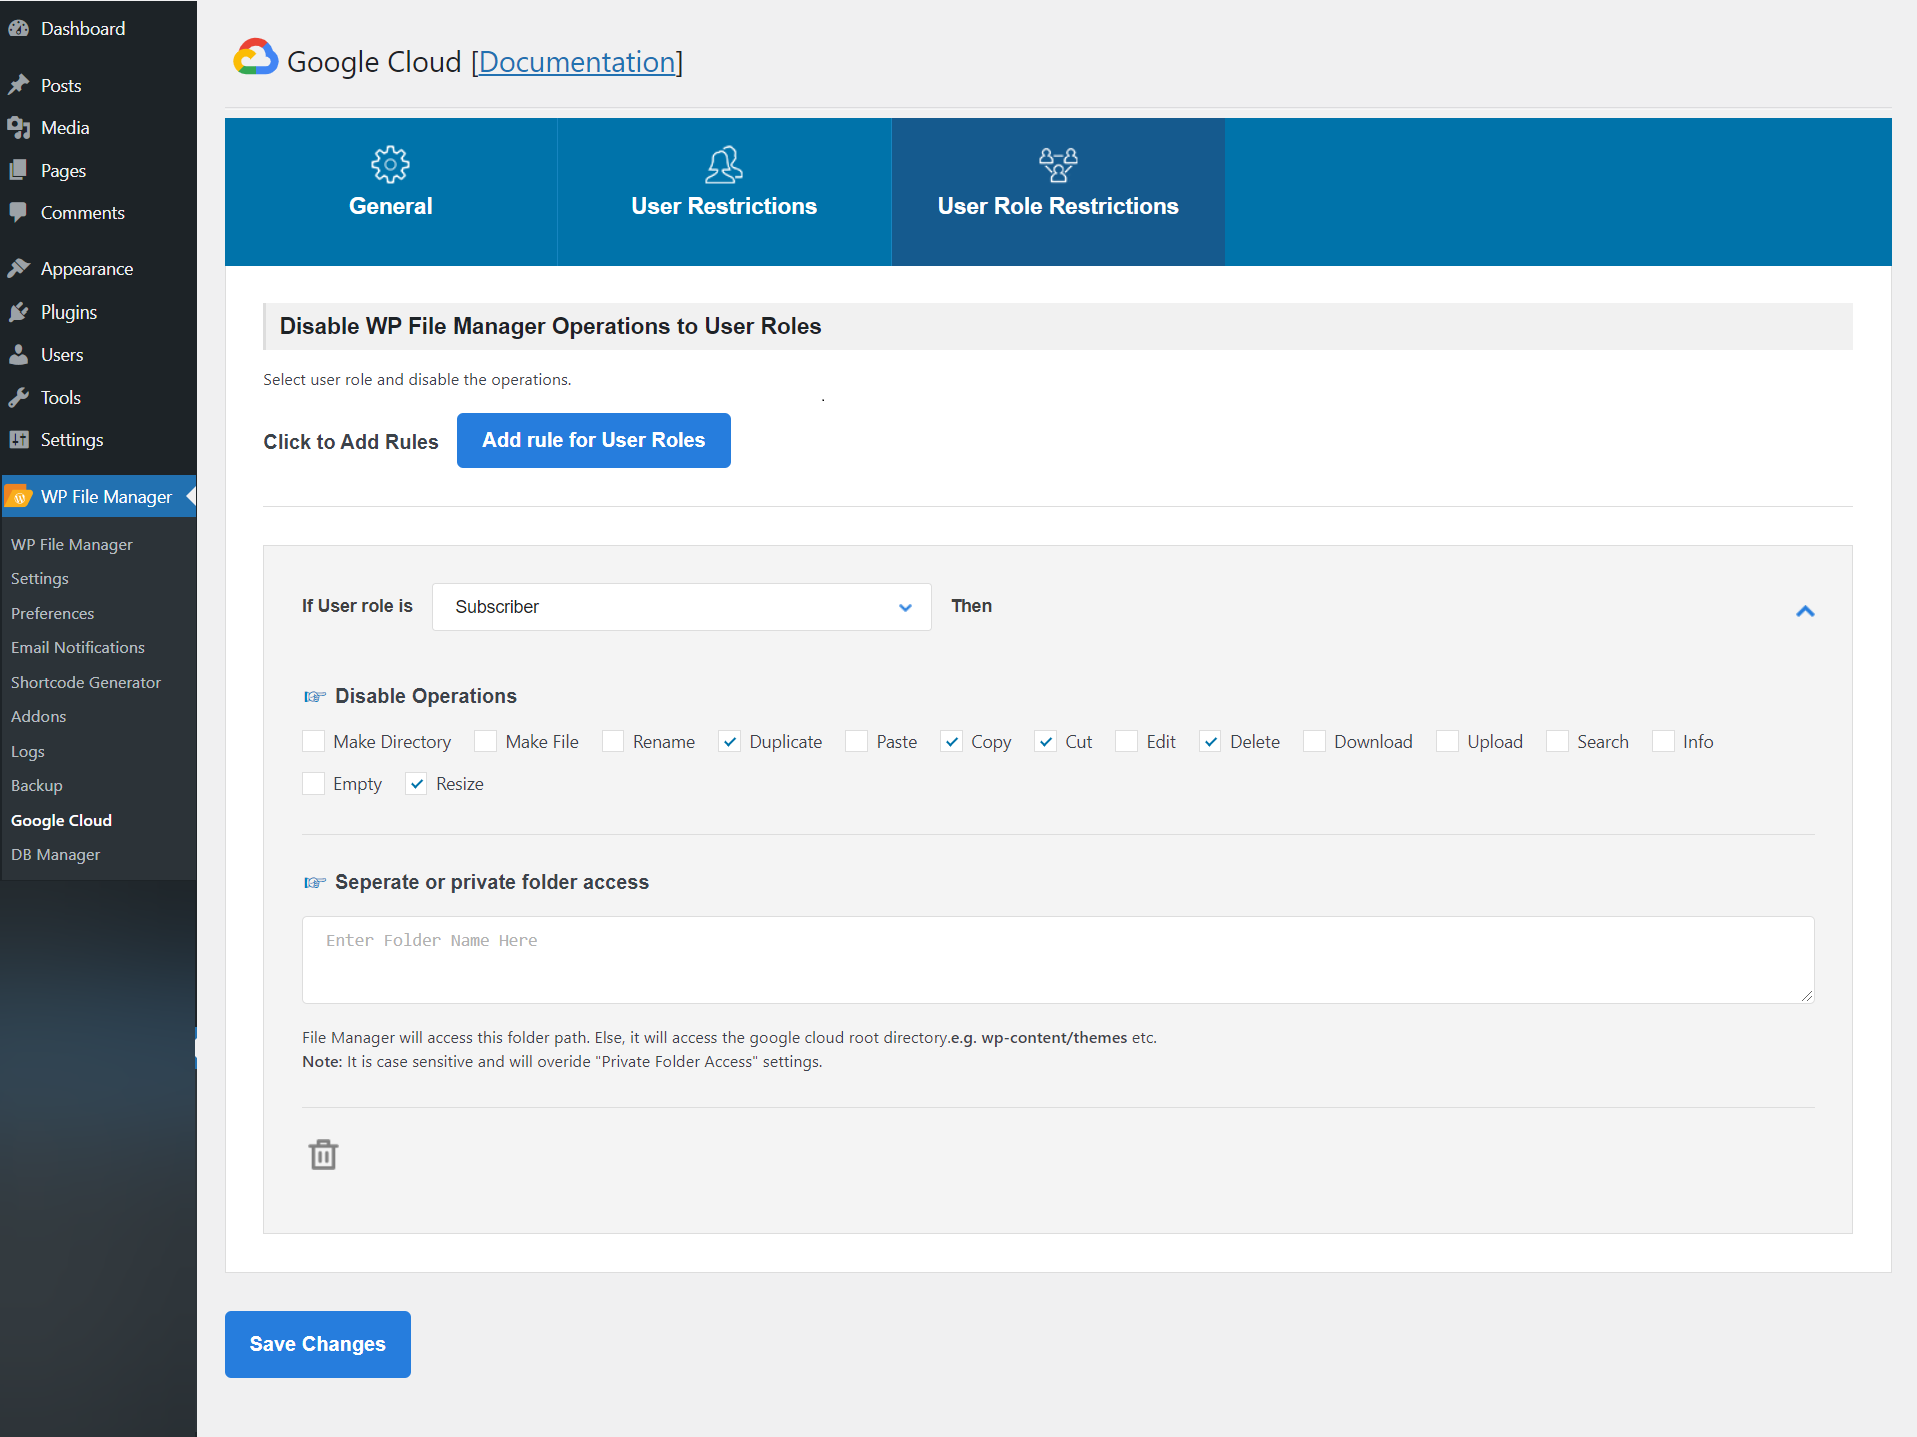
User Role Restrictions: This setting allows you to disable or ban all the users of a specific role from performing operations in WP File Manager Google Cloud. Click on the Add rule for User Roles button to add a rule for their role. There are 3 settings:
- If User Role is: Select a user role from the dropdown list which you want to ban from accessing the WP File Manager Google Cloud operations.
- Disable Operations: Choose the operations which you want to disable for that specific user role.
- Separate or private folder access: You can set a specific folder of the bucket to be accessed by this user role.
Shortcodes: There are 2 shortcodes available to display WP FileManager Google Cloud on the frontend.
- [wp_file_manager_google_cloud bucket=”your_google_cloud_bucket” view=”list” lang=”en” theme=”default” allowed_roles=”administrator,editor,author” allowed_operations=”*” access_folder=”separate_folder-name”]
In this shortcode, all parameters are optional to use in the shortcode. The main objective of adding these options is to lower the dependency of General Settings of Google Cloud. You can use any other Google Cloud bucket here. In this way, you can connect multiple Google Cloud buckets using this shortcode
- [wp_file_manager_google_cloud_admin]
Using this shortcode you can create an admin view of your Google Cloud on your WordPress page/post.