$29.00
The Cloudflare R2 Storage Add-on effortlessly connects Cloudflare R2 with File Manager Pro. It lets you manage, upload, edit, and organize files stored in R2 buckets—all directly from your WordPress dashboard.
Description
Key Features:
- Embed Storage Folders: Display Cloudflare R2 storage folders on your website pages effortlessly using simple shortcodes.
- User-Friendly File Management: Enable logged-in users to upload, download, and manage files with ease.
- Seamless Integration: Enjoy a streamlined experience with intuitive WordPress dashboard access through File Manager Pro.
- Secure Synchronization: Benefit from fast, secure, and efficient file syncing with your Cloudflare R2 bucket.
- Optimized for Collaboration: Perfect for sharing files and collaborative workflows across teams or users.
Installation Steps
Step 1: Enable the Add-on
- Go to WP File Manager in your WordPress dashboard.
- Once the Cloudflare R2 Add-on is activated, you’ll see the Cloudflare R2 option under WP File Manager.
- Click on Cloudflare R2 and enable it by ticking the checkbox at the top.
Step 2: Create a Bucket and Get the Account ID
- Open cloudflare in a new tab and log in.
- Navigate to R2 Storage in the sidebar menu:
- Go to R2 Storage > Overview > Create Bucket from the overview menu.
- After creating the bucket, open it and switch to the Settings page.
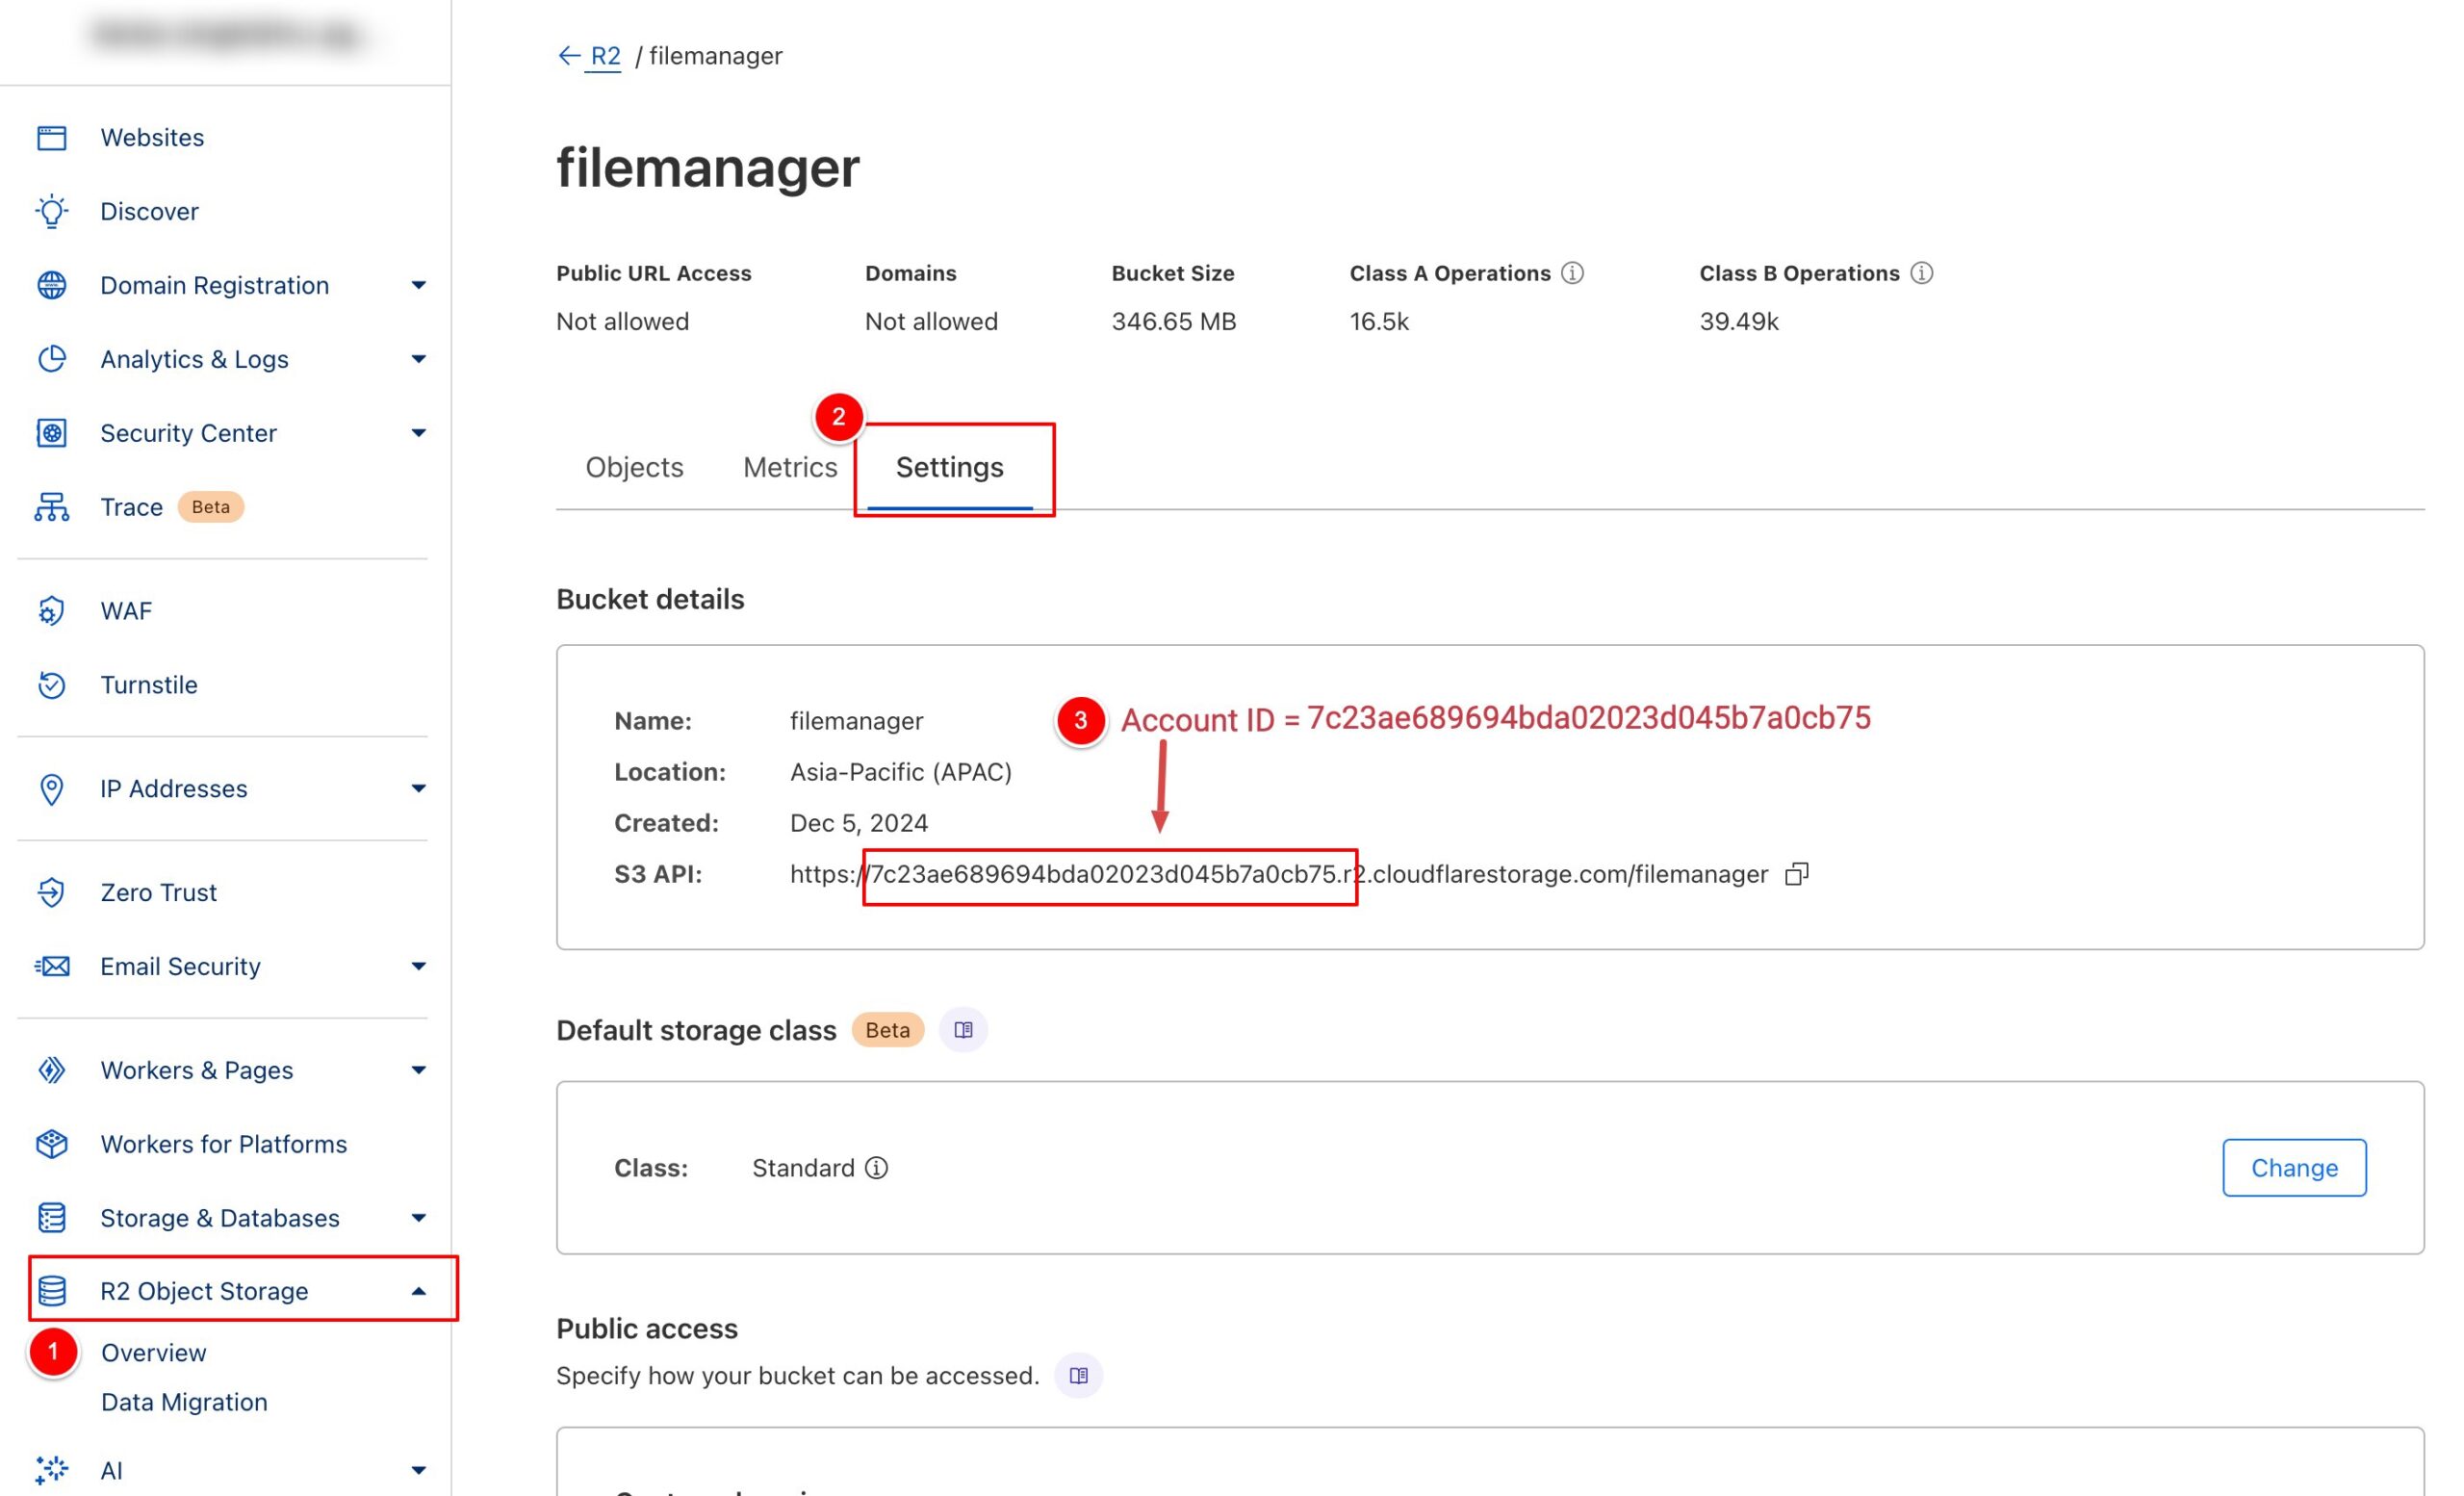
Note: You can also find the Account ID in the URL of the Cloudflare dashboard.
Step 3: Get the Access Key ID and Secret Access Key
-
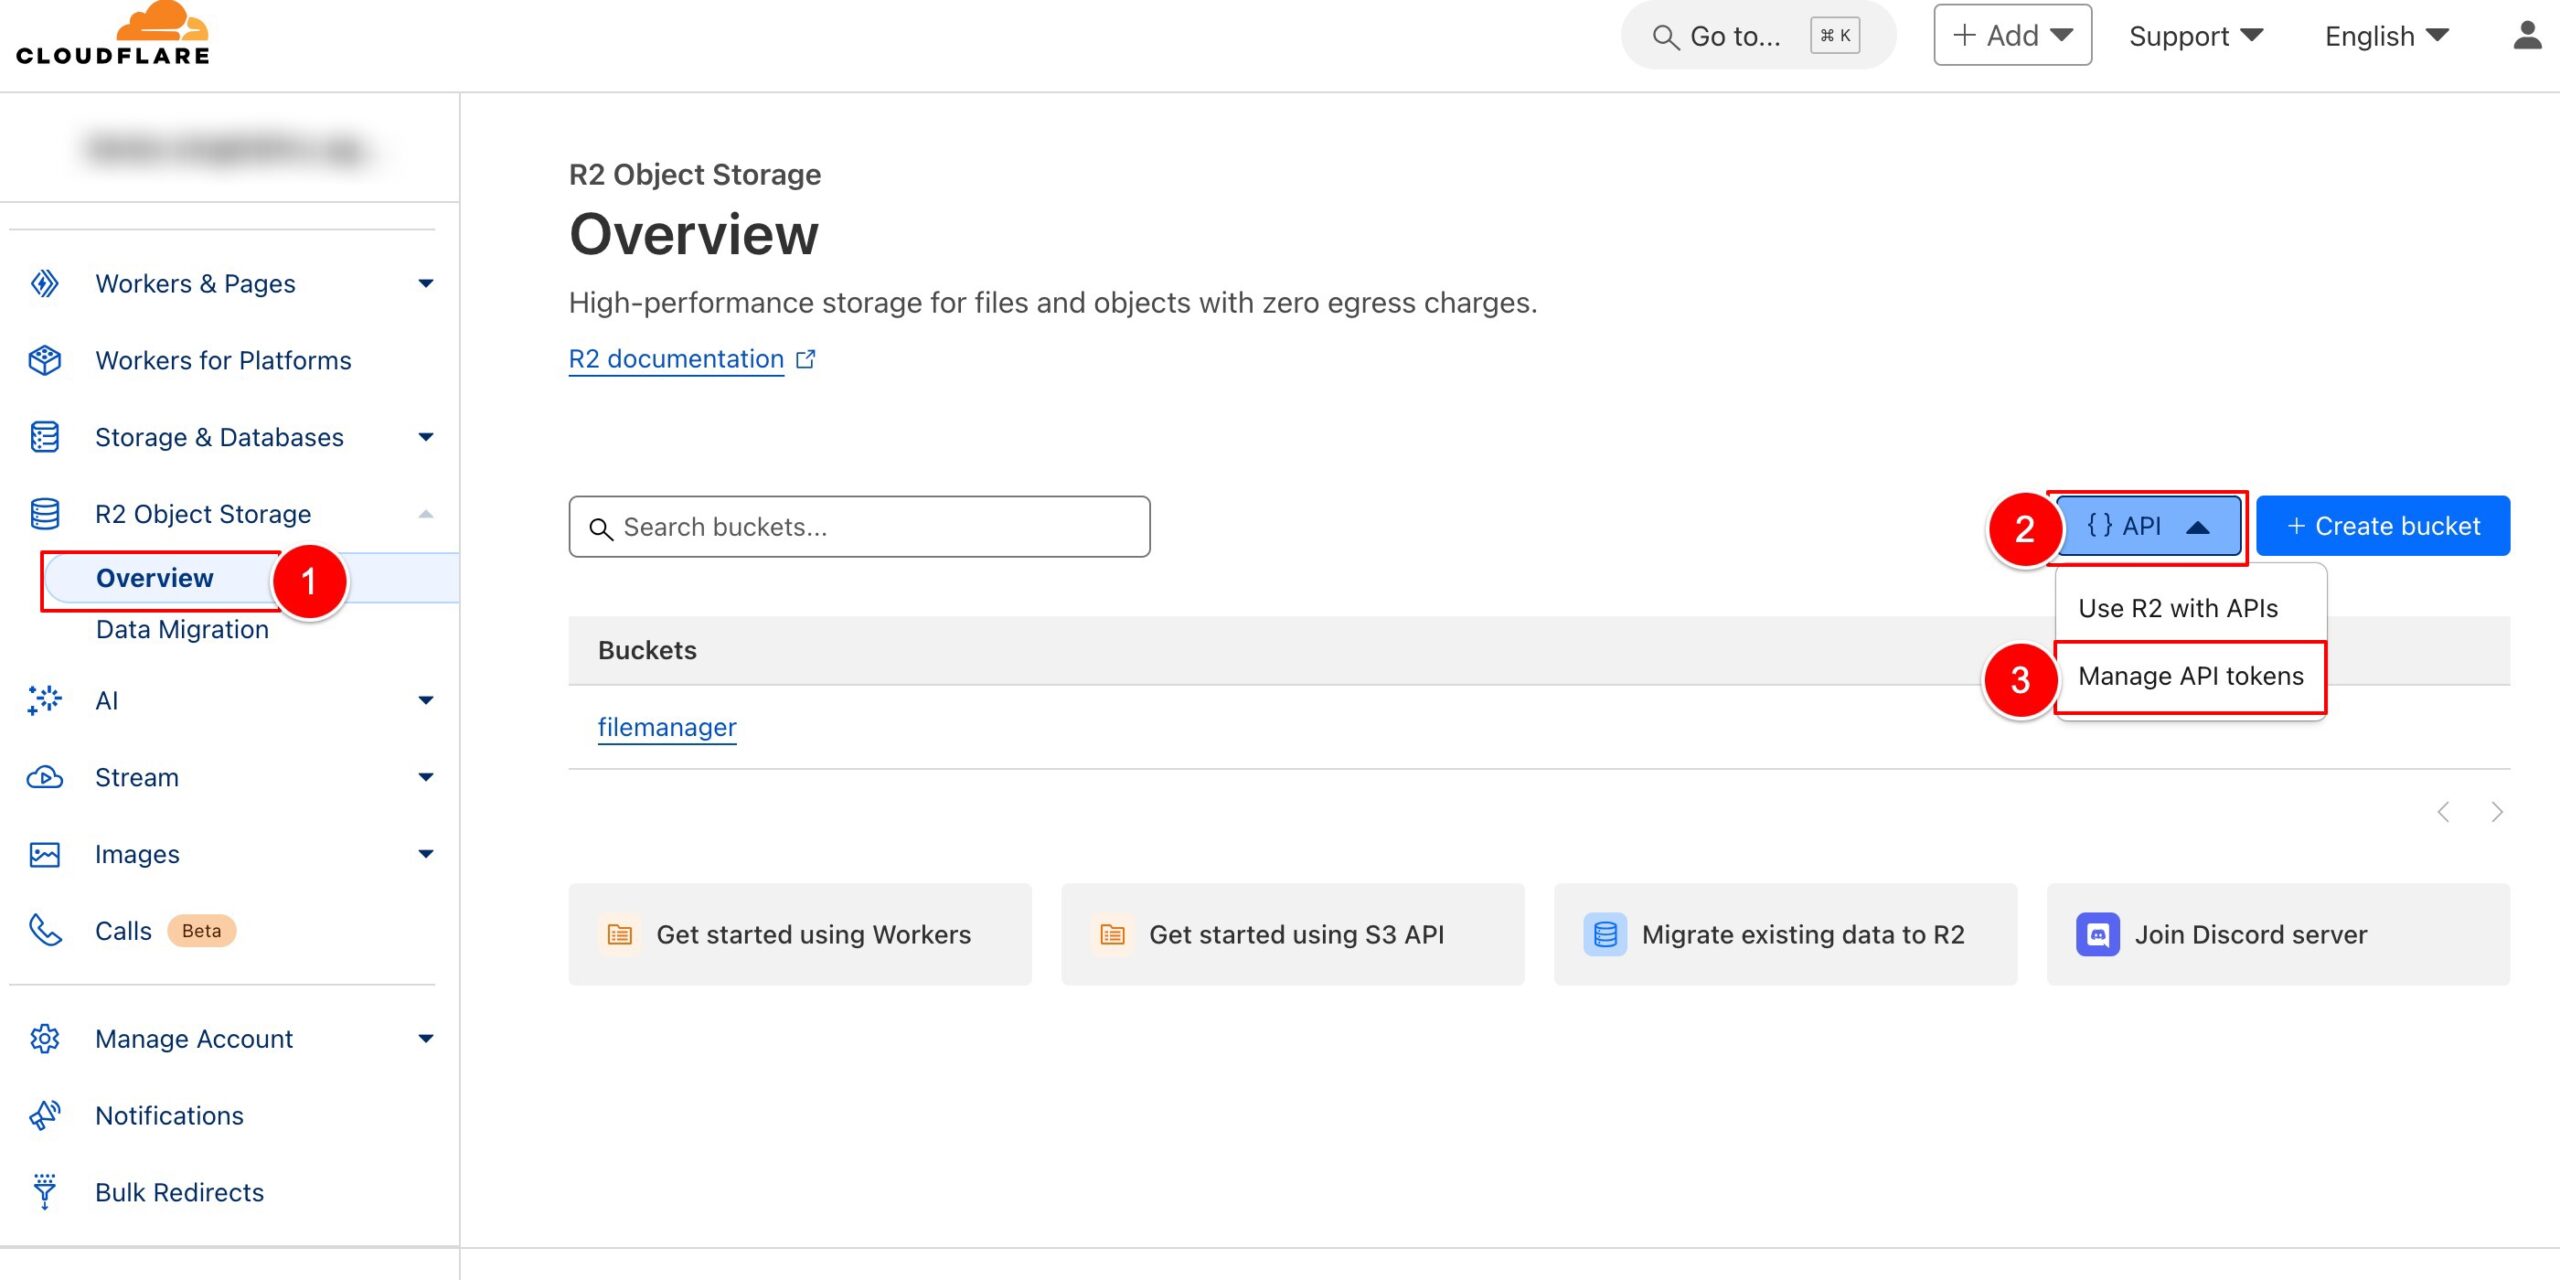
- Under the Overview tab, click on the API dropdown and select Manage API Tokens.
-
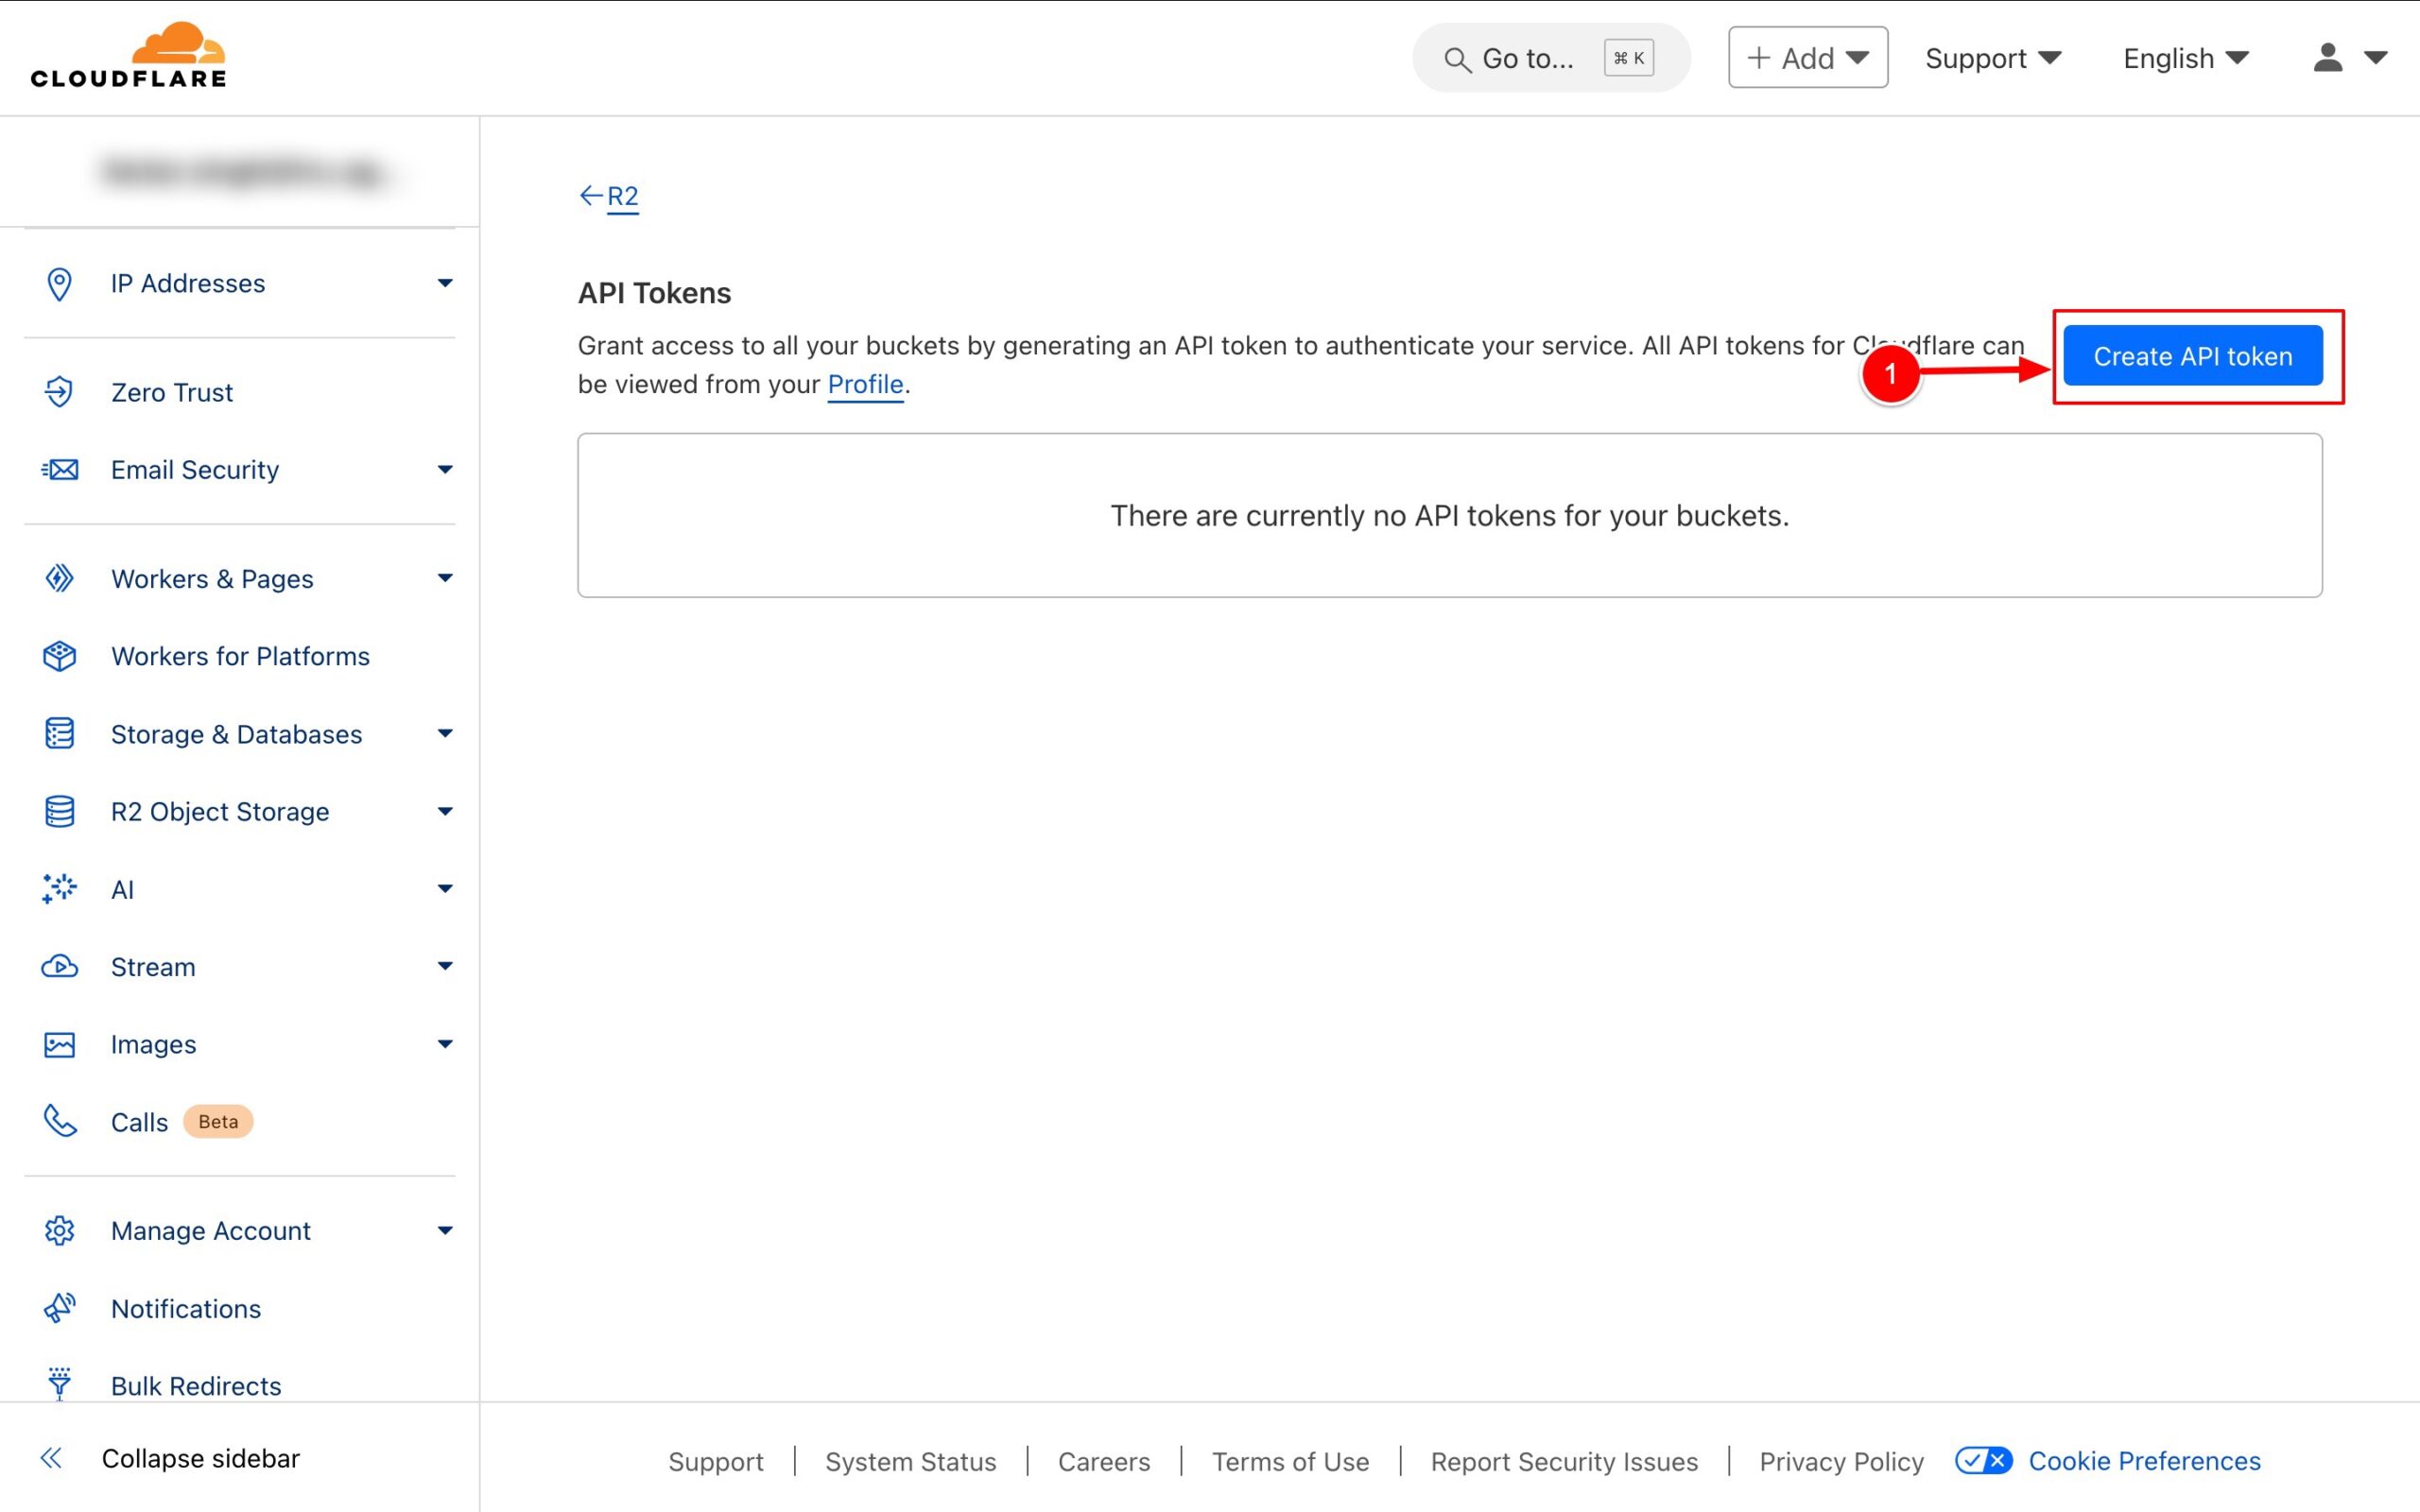
- On the next page, click Create API Token (or edit an existing one).
-
- Set the following permissions:
- Object Read & Write
- Specify Bucket(s): Select the bucket you created.
- TTL: Set to “Forever” or choose a custom value as needed.
- Set the following permissions:
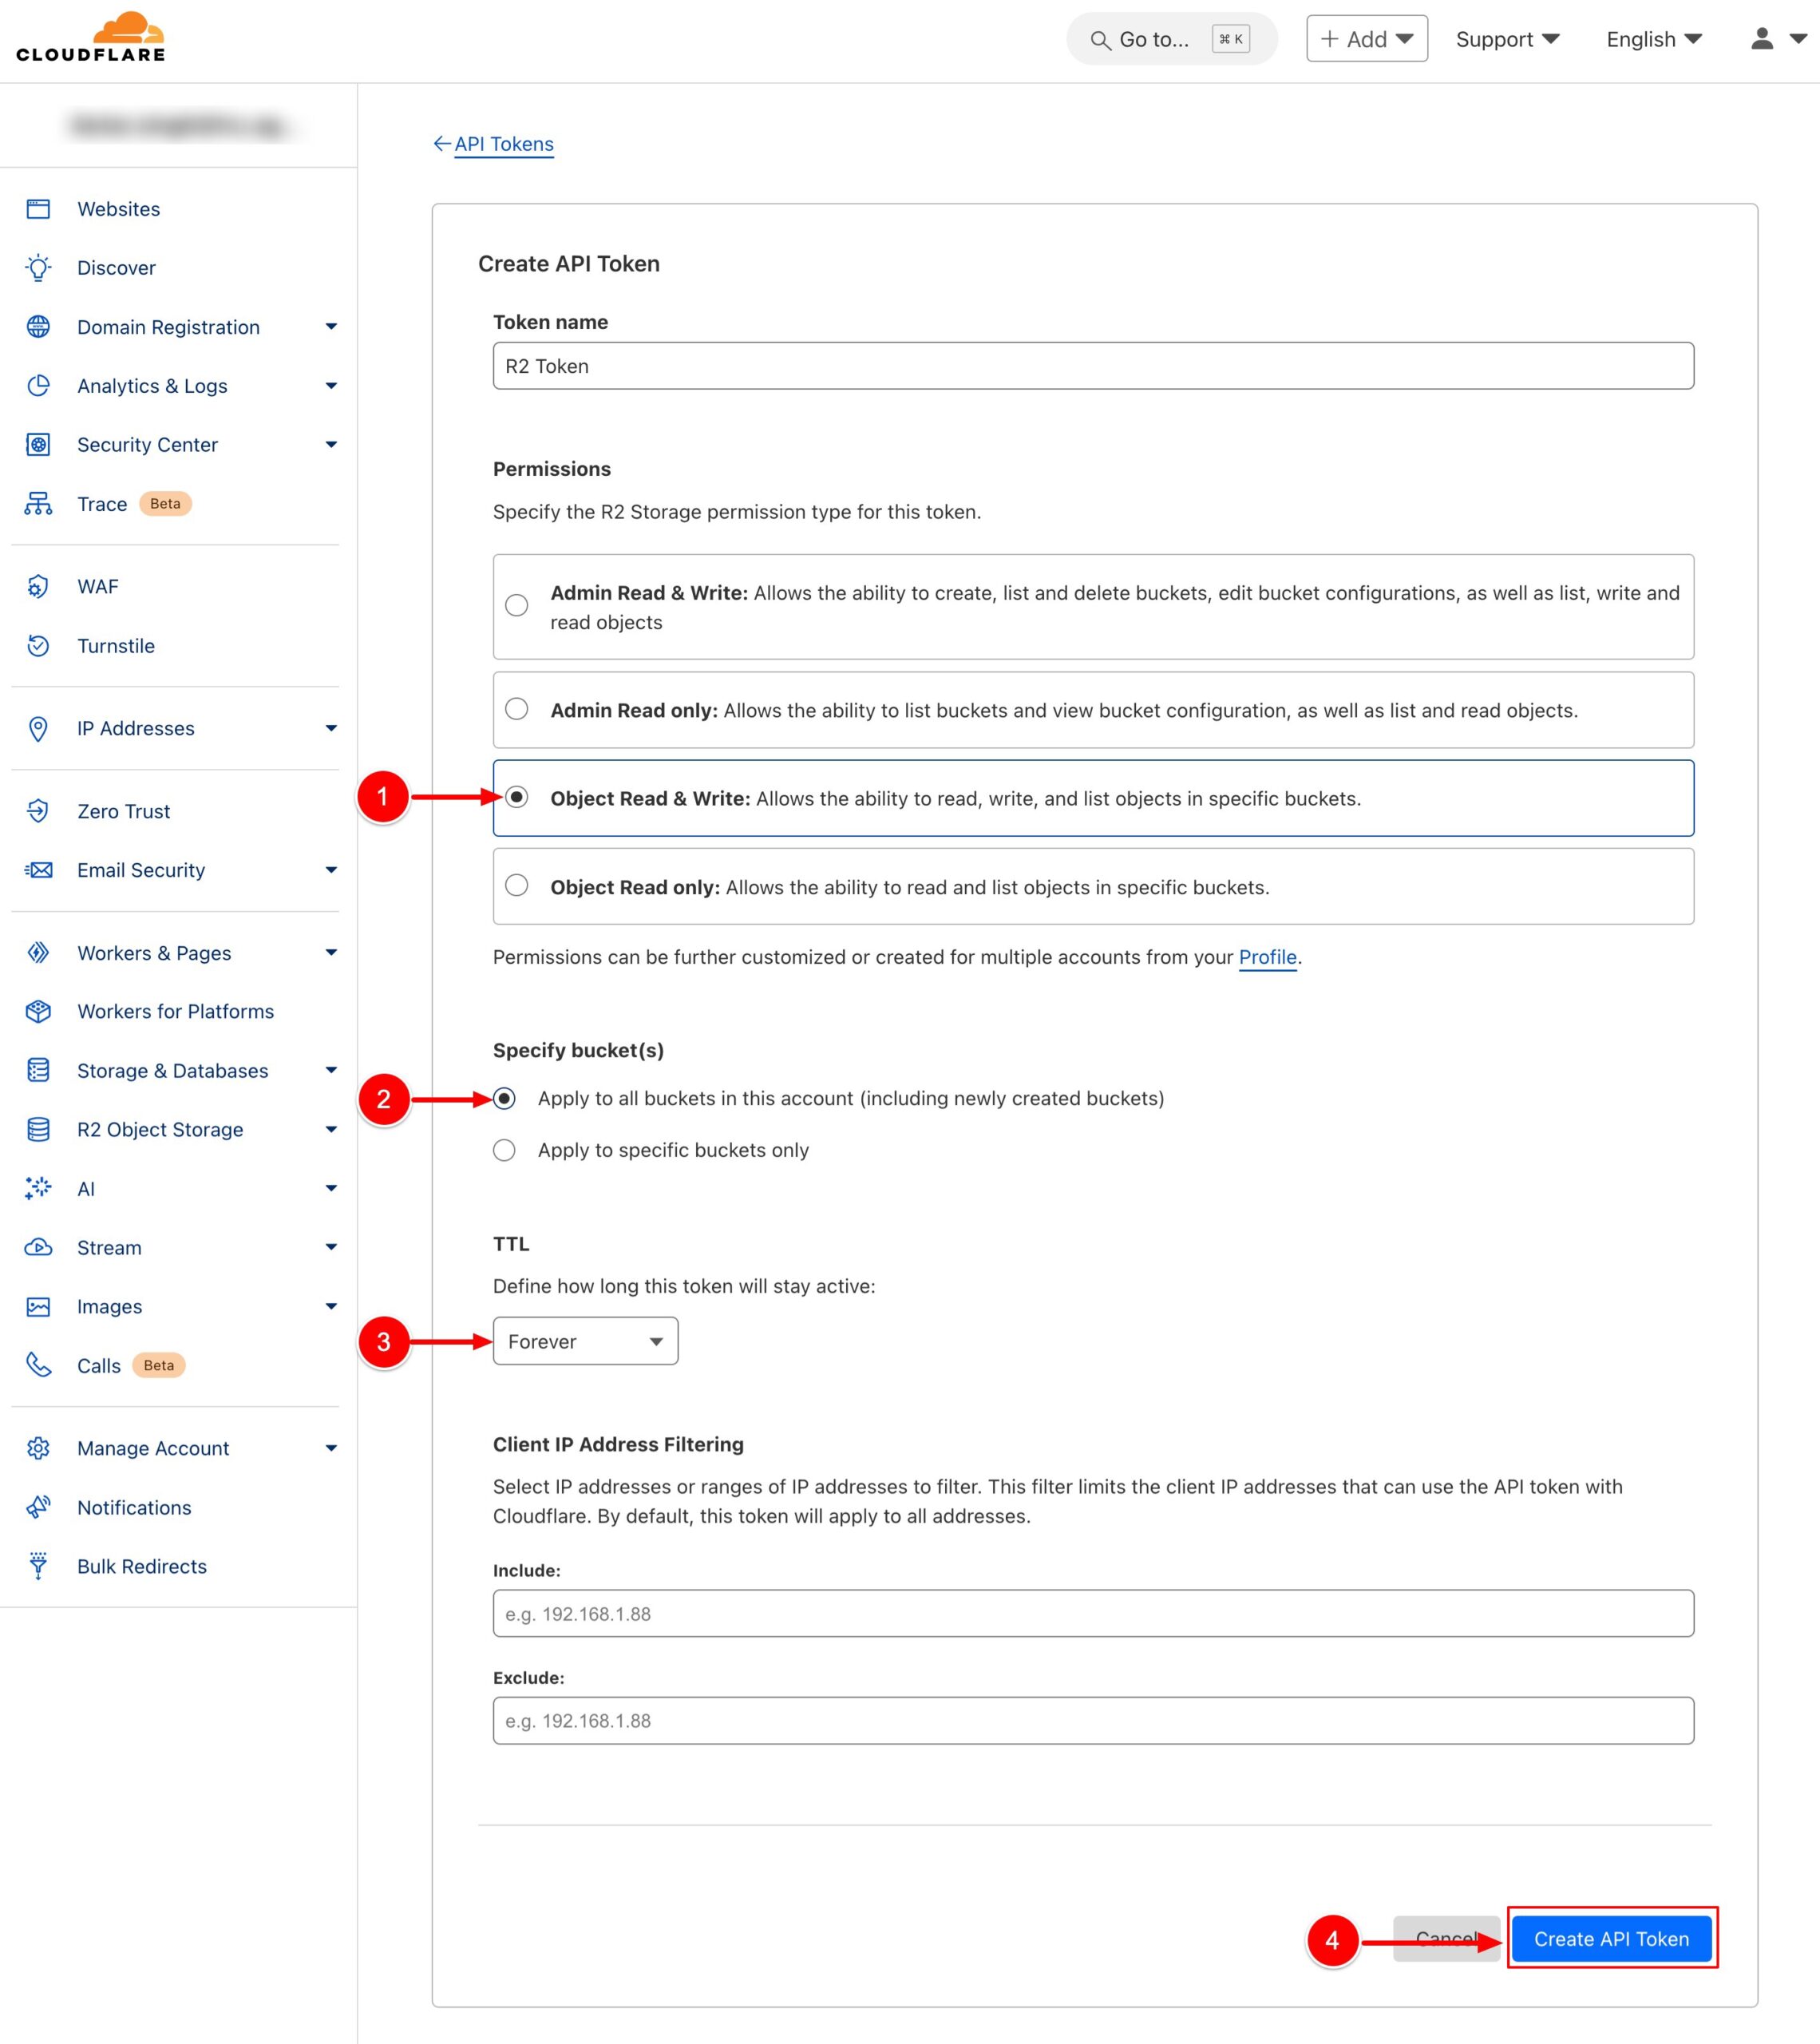
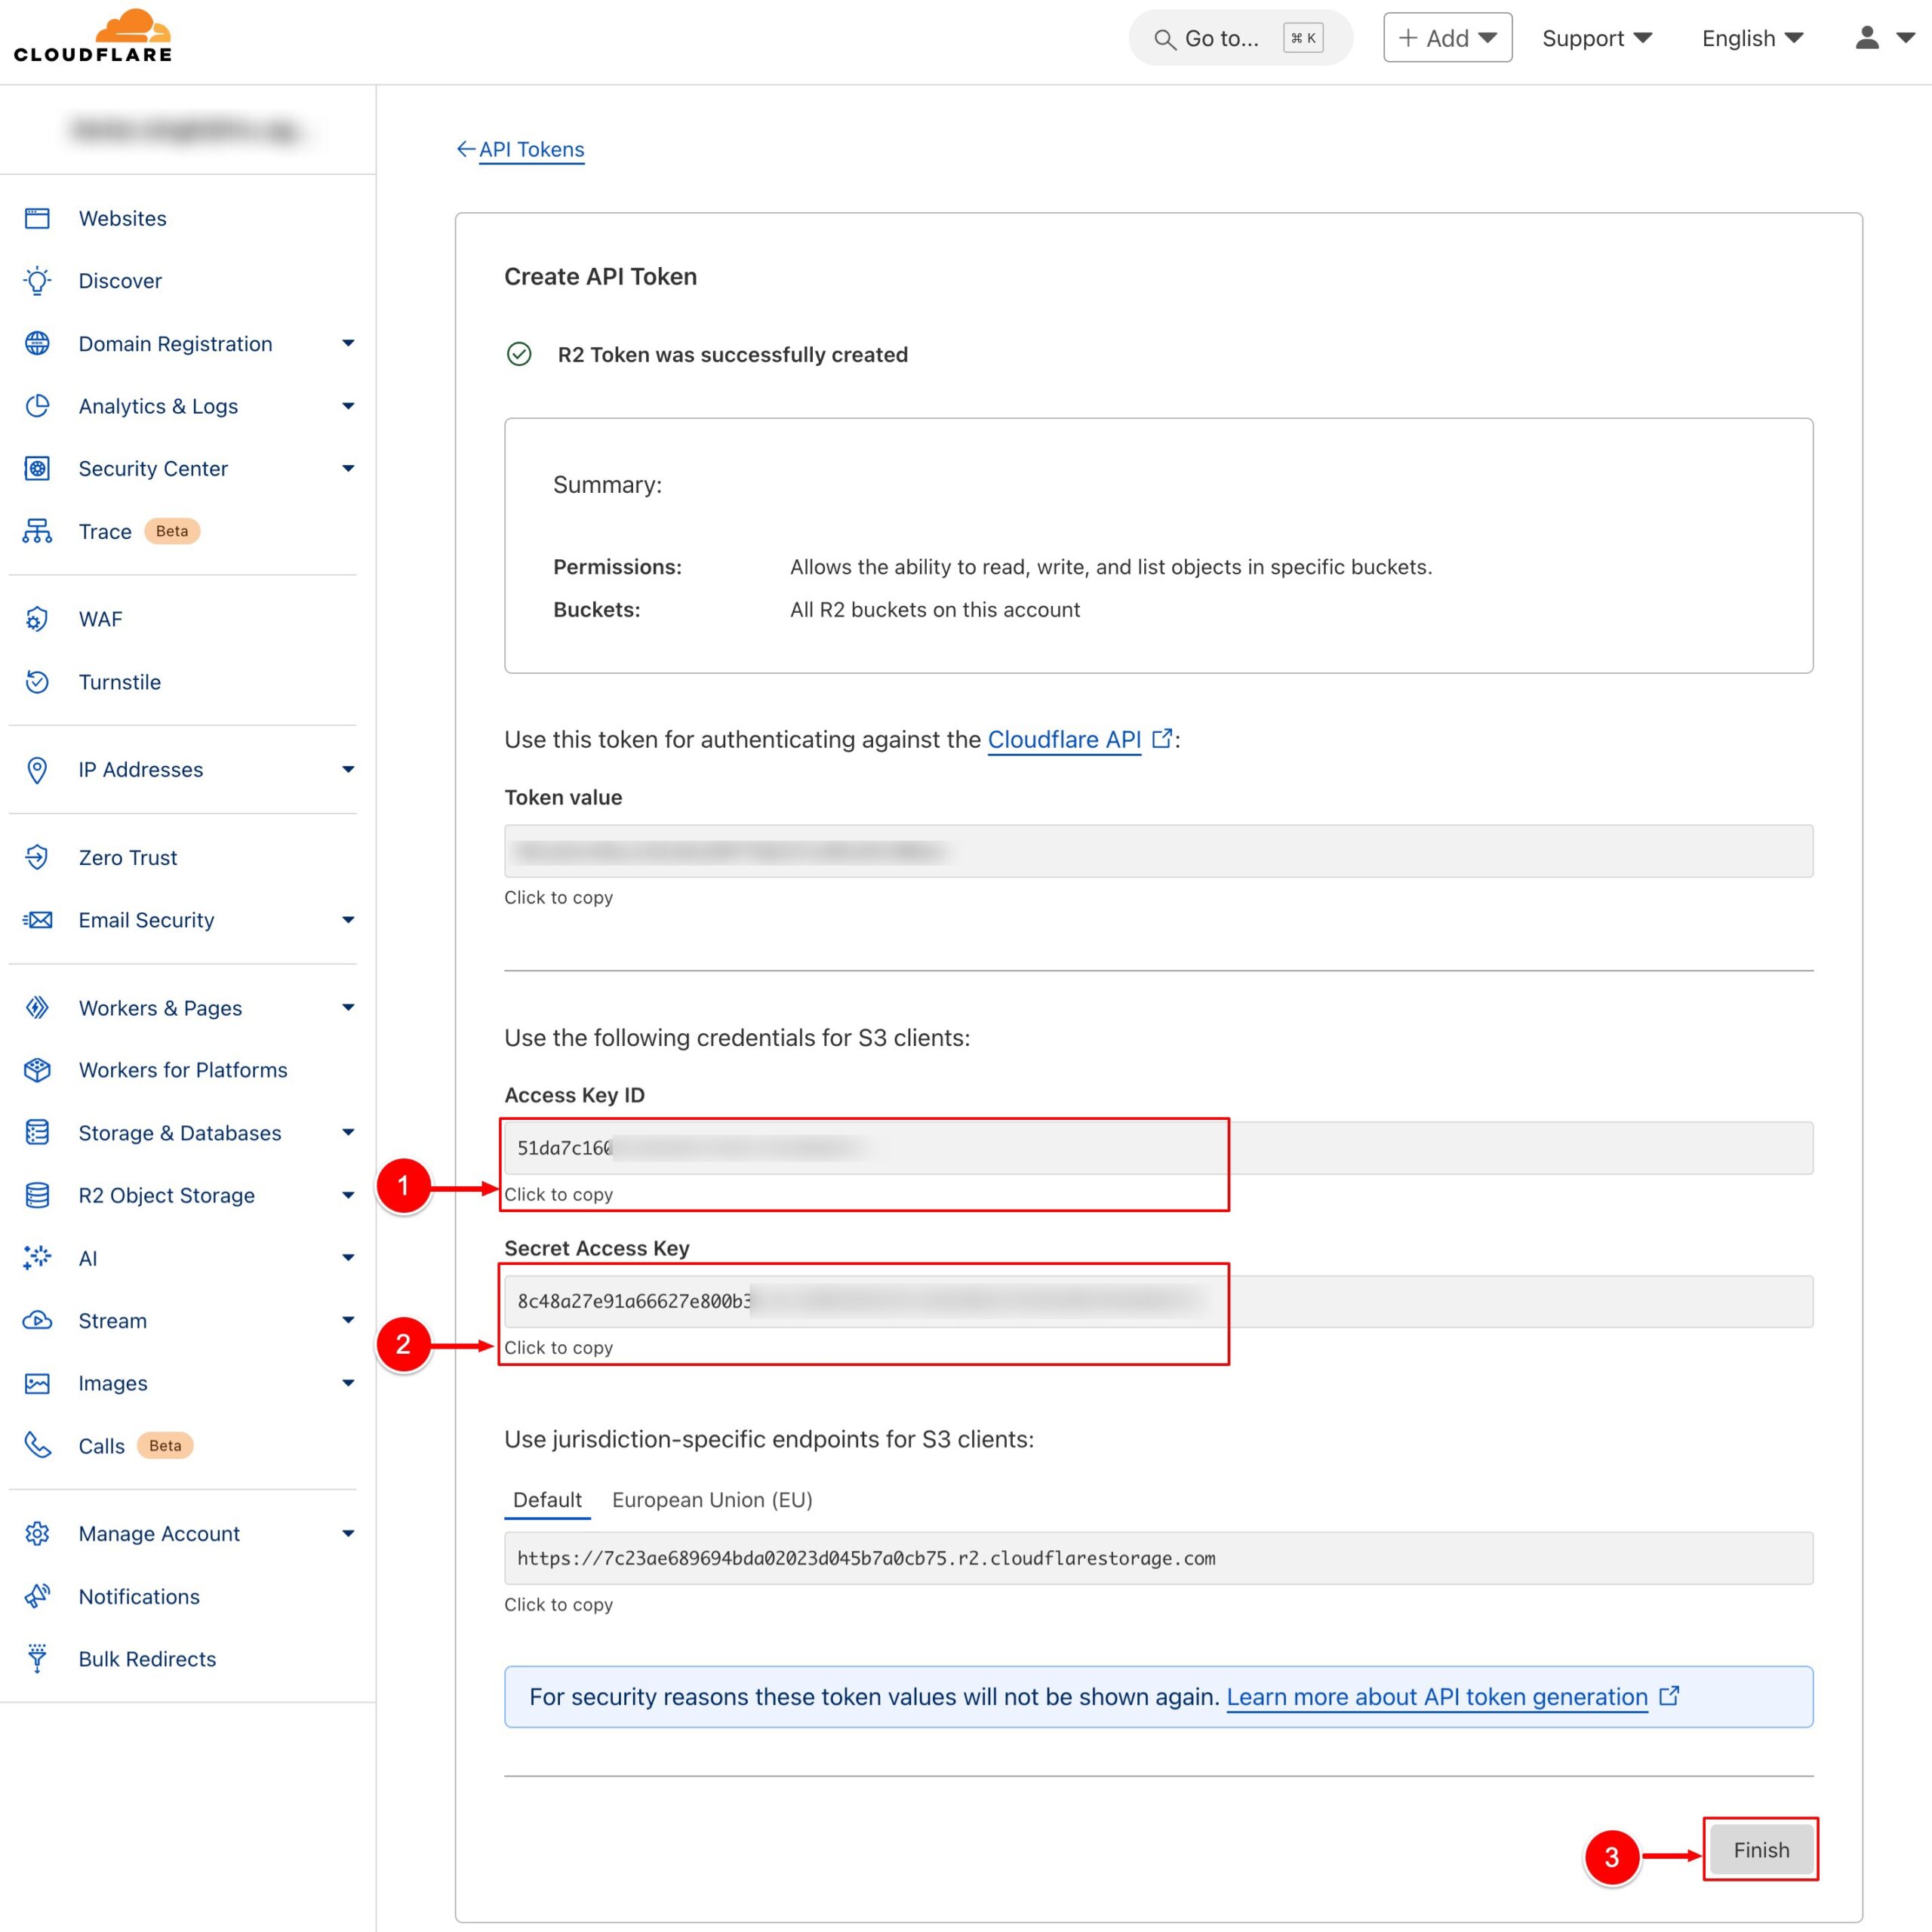
- Click Create API Token and copy the details to move to the next page.
- Then, copy-paste all the details into the Cloudflare R2 add-on installed on your website and click on Finish.
Now, in your website dashboard:
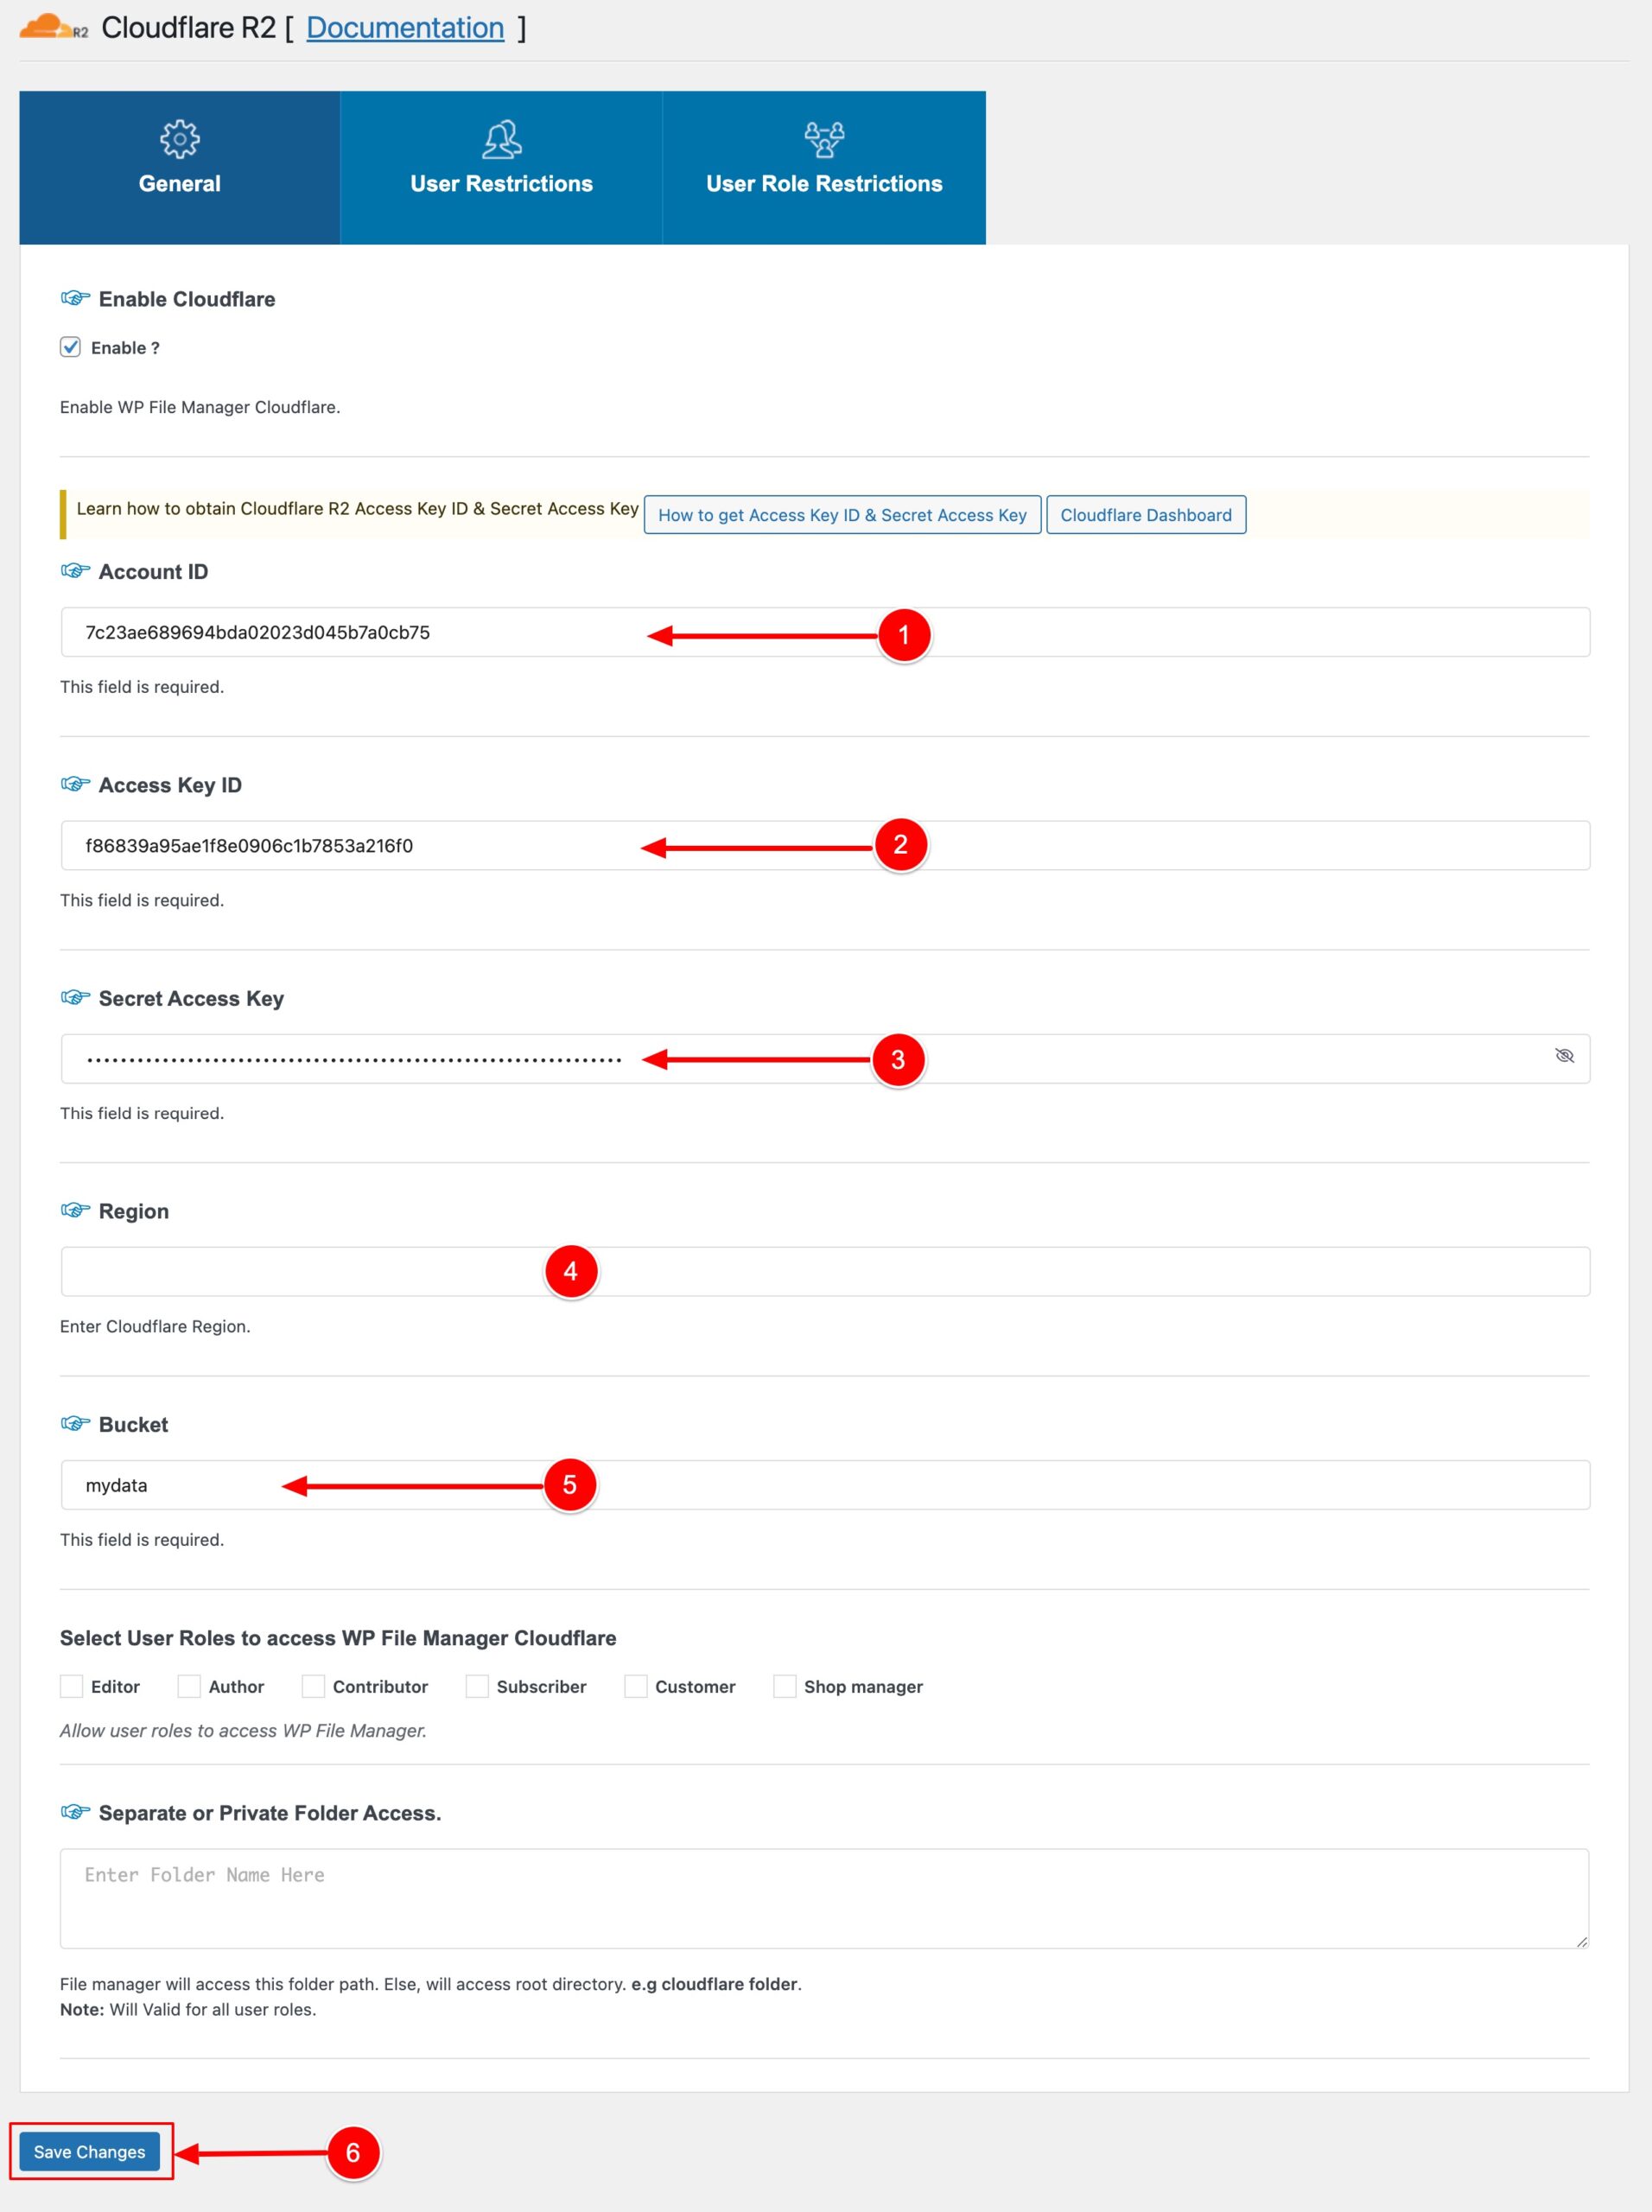
- Navigate to WP File Manager > Cloudflare R2.
- Input the following details in the respective fields:
- Account ID: Copy the account ID from the Cloudflare dashboard (refer to Step 2).
- Access Key ID and Secret Access Key: Copy from the API token you created.
- Region: Leave this field blank (it will auto-select).
- Bucket Name: Enter the name you assigned while creating the bucket.
- Click Save Changes to apply the settings.
Step 4: Final View
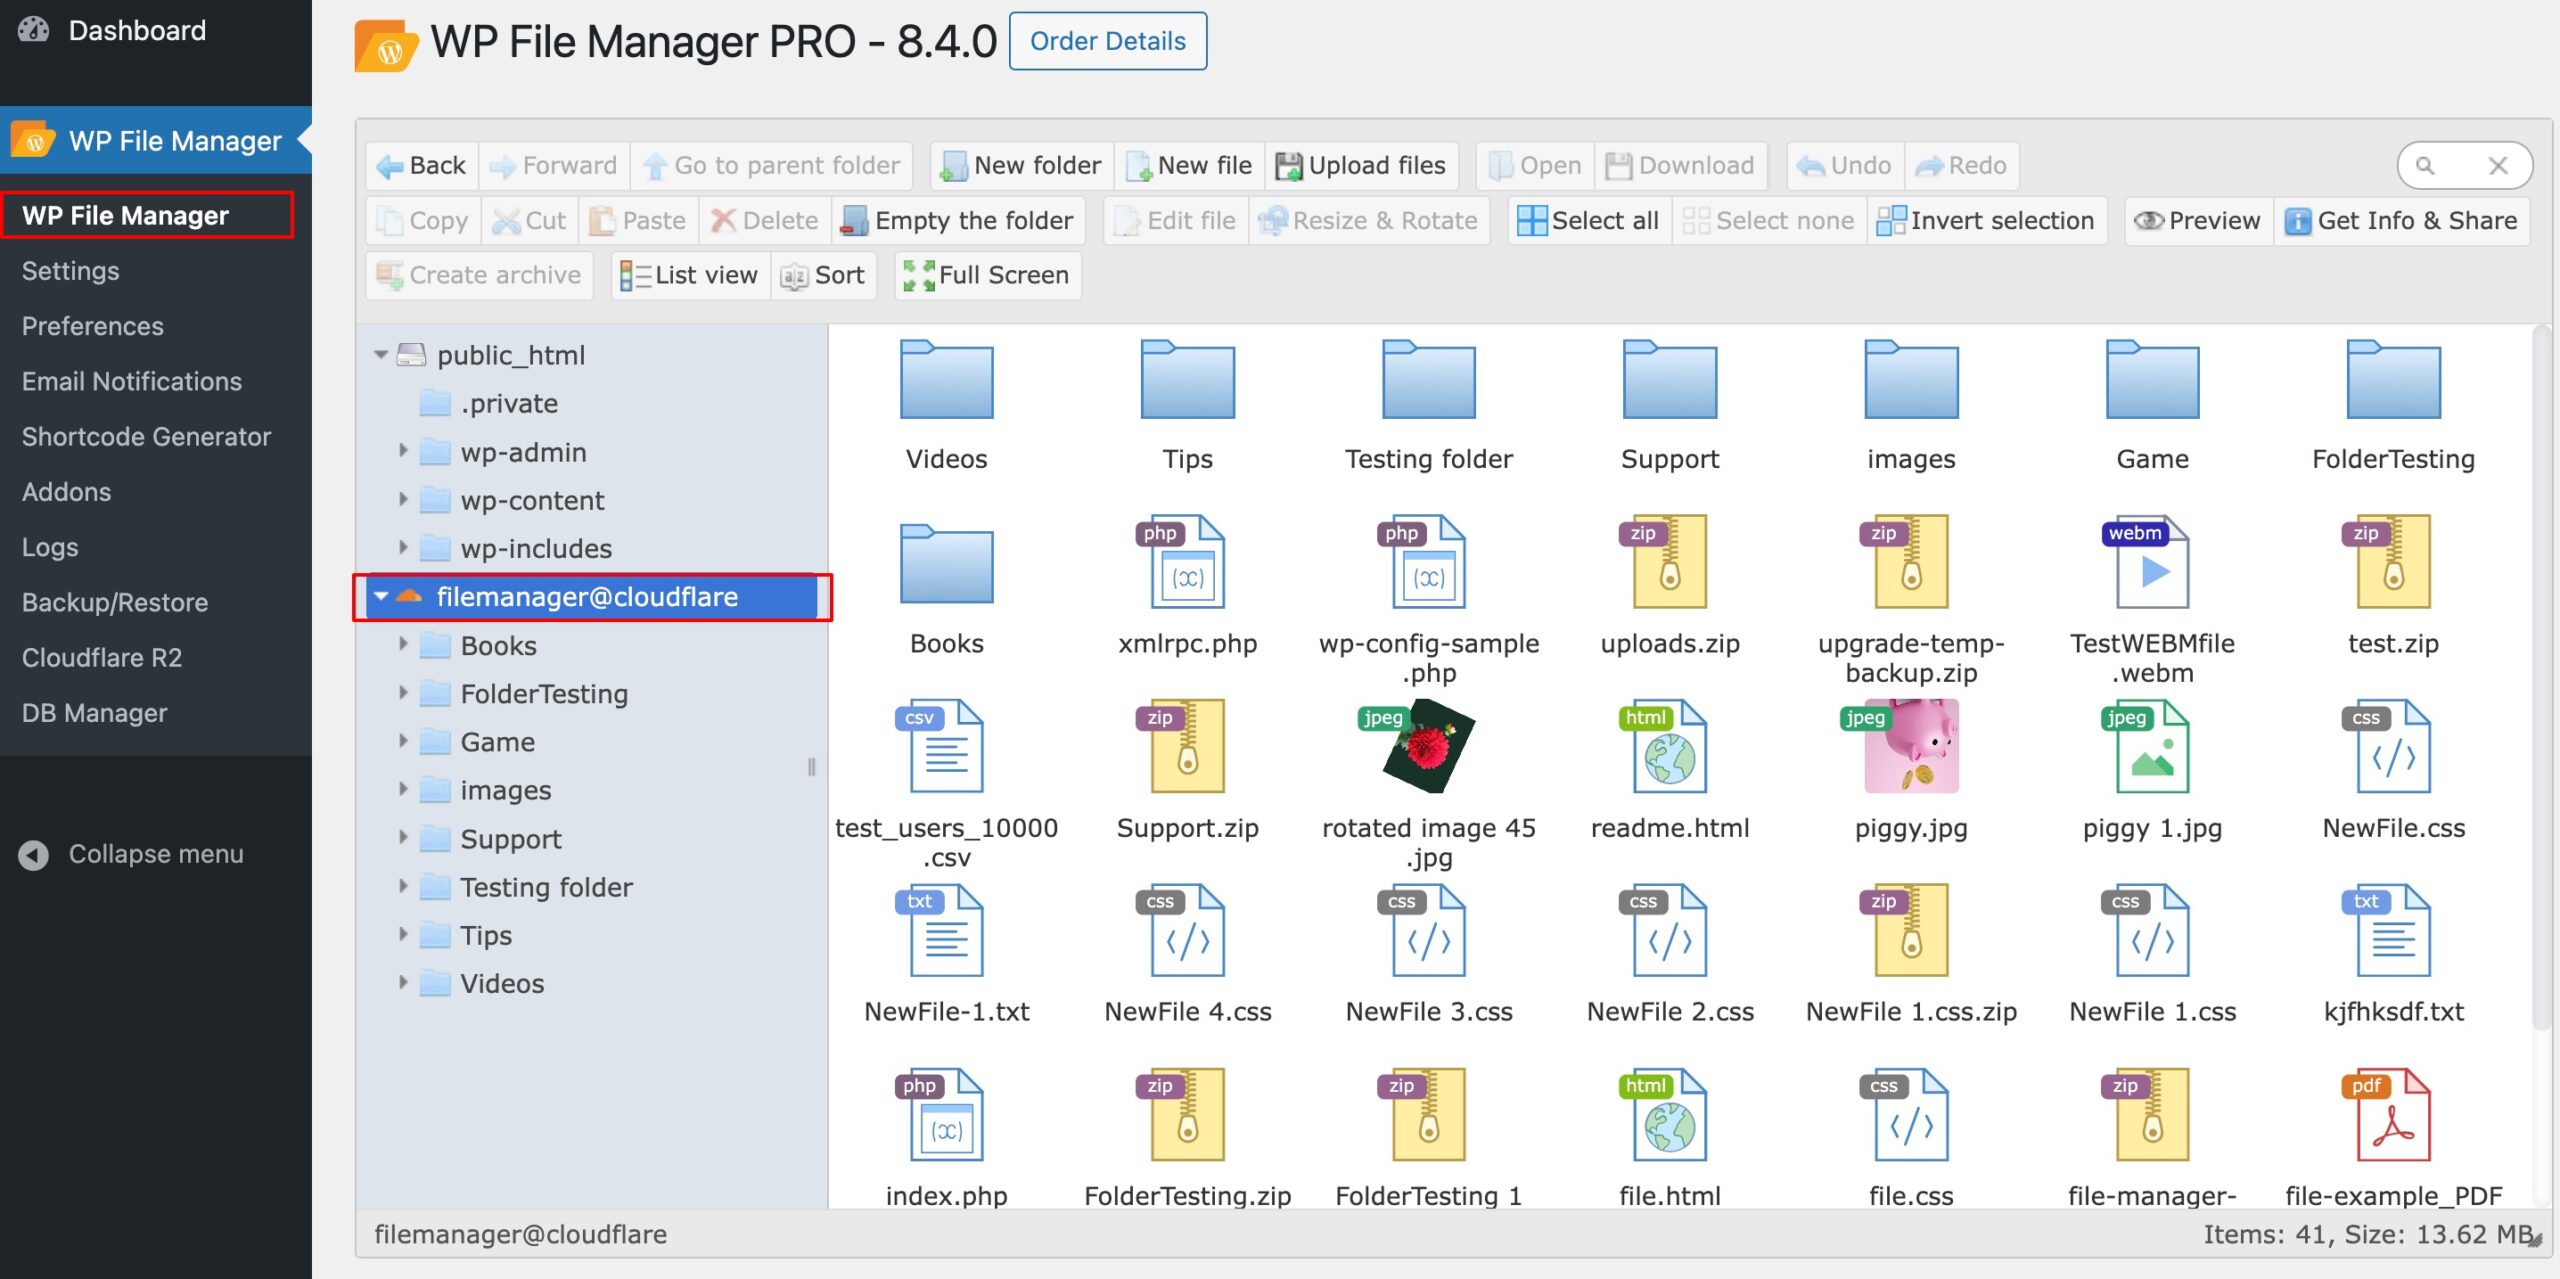
- Open WP File Manager and your bucket will appear as BucketName@cloudflare.
- You can now seamlessly copy and paste data between your website and the Cloudflare R2 bucket.
Important Notes:
- Renaming files in the bucket is not supported because these files are already stored as objects. Changing their names could cause disruption, as the system relies on the original object names to locate and manage the data efficiently.
- To display the Cloudflare bucket on website pages, use shortcodes.
- Duplicating objects is not allowed in the bucket system—duplicate files cannot exist in the same bucket.

 Supercharge File Manager Pro with the New Cloudflare R2 Addon
